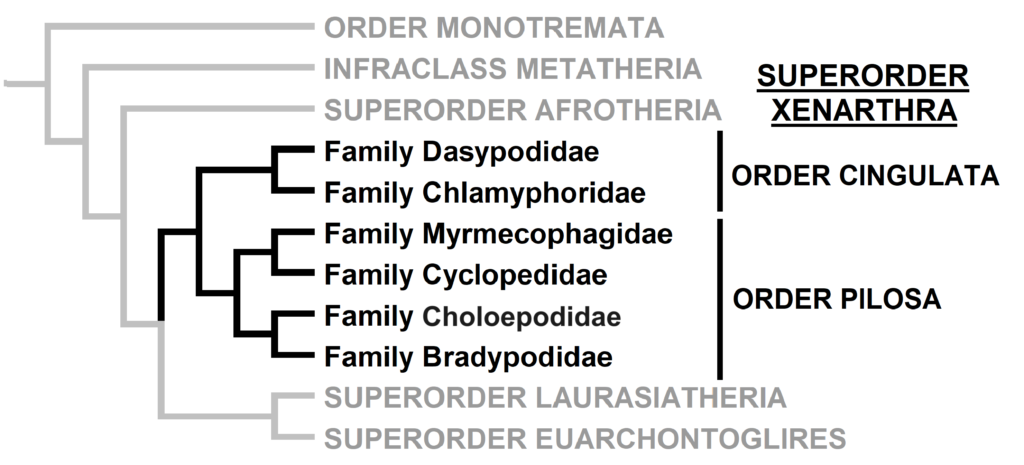
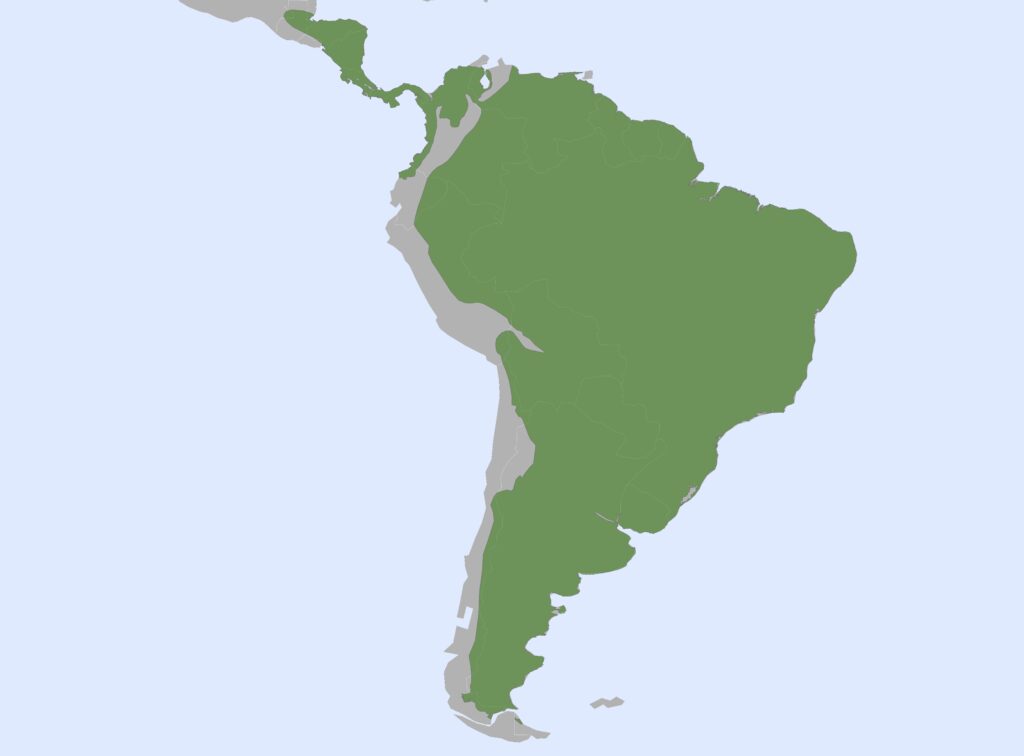
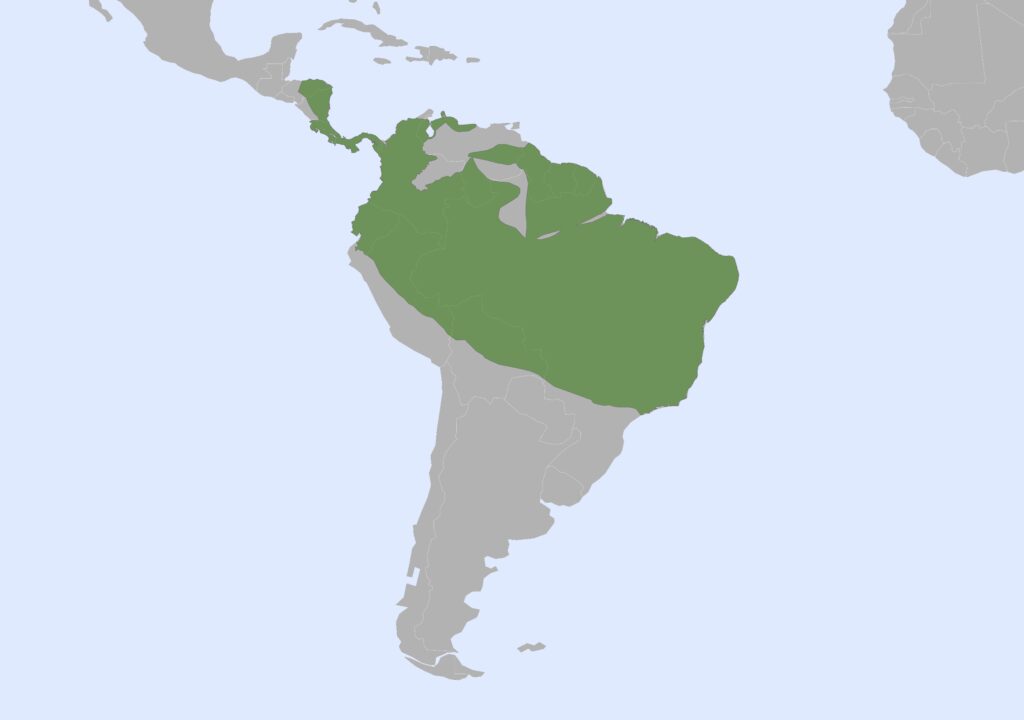
Superorder Xenarthra includes the armadillos, sloths, and anteaters, which have a strange set of shared characteristics. Their relationship with Afrotheria and Boreoeutheria has long been debated but recent studies suggest they are sister to Afrotheria, diverging about 84 million years ago. Members of Xenarthra live primarily in South and Central America and underwent a great diversification there, resulting in the three very different orders we know today.
Jump down to:
General Characters
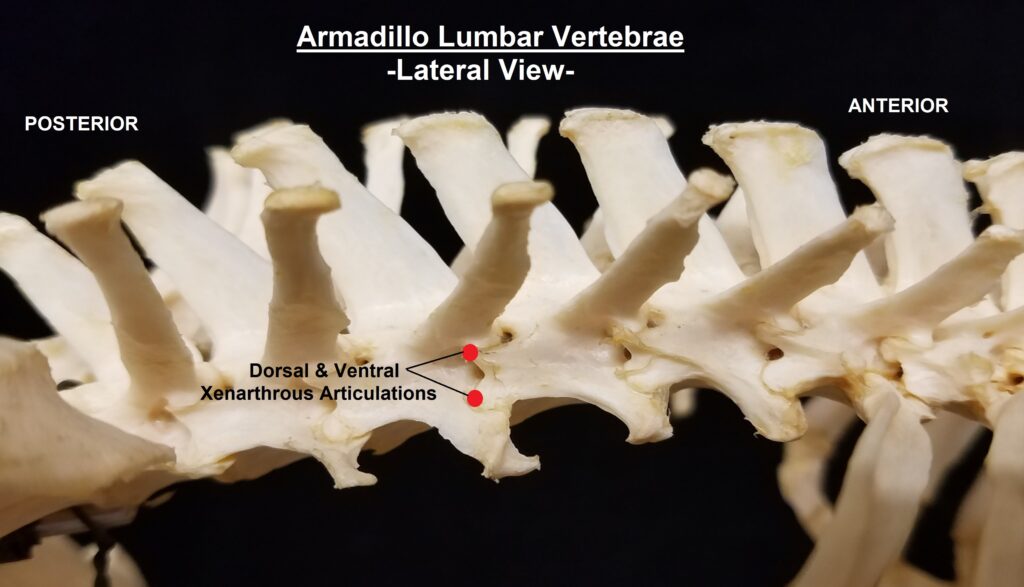
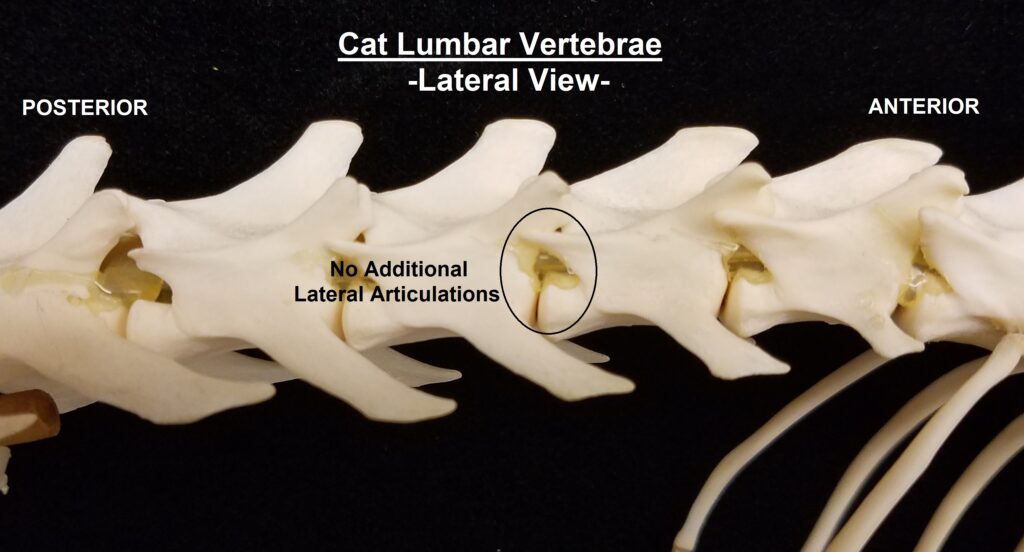
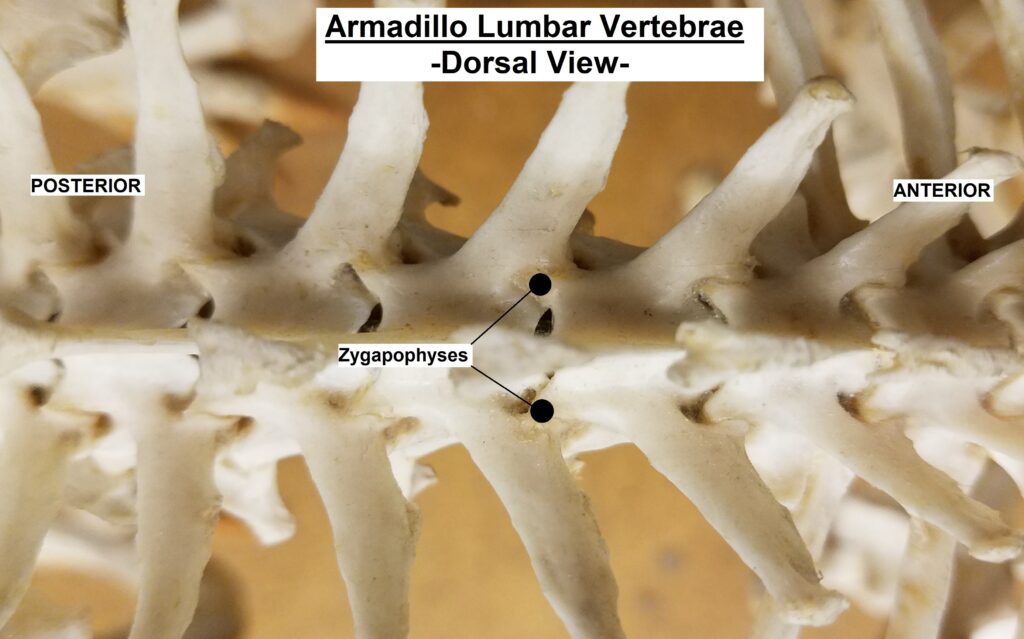
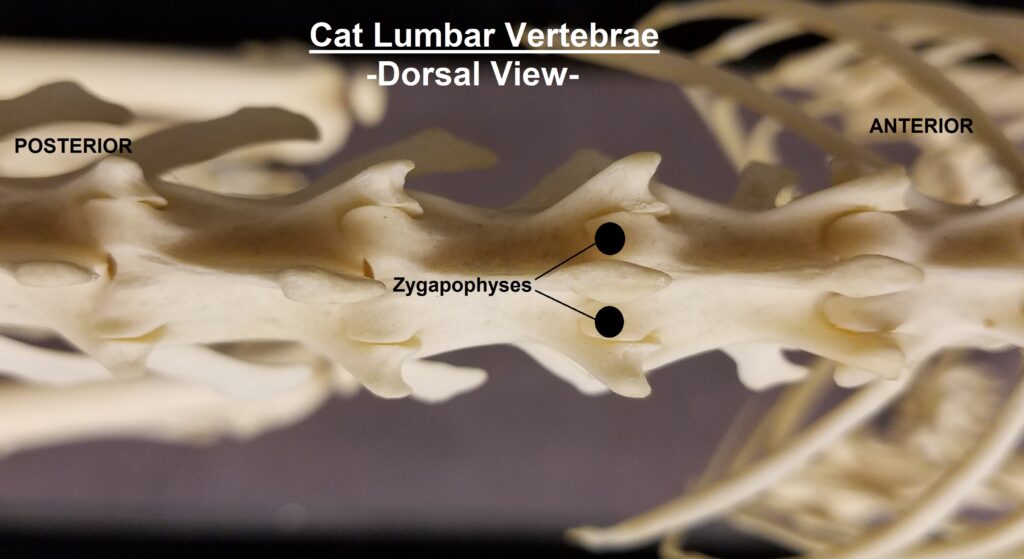
The main diagnostic character of xenarthrans are two additional zygapophyses on the lateral surfaces of their lumbar and thoracic vertebrae. These xenarthrous articulations (“xenarthrales”) strengthen the spine and joints, but have been lost in extant tree sloths to increase flexibility (n.b., fossil ground sloths do have these articulations). The dorsal zygapophyses of xenarthrans are the typical mammalian form.
Xenarthrans are also unique in dentition, entirely lacking incisors and canine teeth. They either lack teeth entirely (anteaters) or have homodont cheekteeth lacking enamel. The lack of enamel exposes dentine, which is more prone to wear, creating flat grinding surfaces for processing insects (armadillos) or leaves (sloths).
Finally, xenarthrans have the lowest metabolic rates of all the therians. This makes most species slow moving and low-resource scrublands of South America could support larger numbers of big-bodied xenarthran species.
Evolution
For many years, the xenarthran taxa were grouped with other anteating mammals (pangolins and aardvarks) into a group called “Edentata”, meaning “toothless”. Now that we know that pangolins belong in Laurasiatheria and aardvarks belong in Afrotheria, the older name Xenarthra is now used to describe the current suborder. Xenarthrans evolved in South America 84 million years ago, becoming very diverse. The first fossils date to the Miocene, 59 million years ago, and only much later did they cross into Central and North America during the Great American Biotic Interchange (commonly abbreviated as GABI) about 2.7 million years ago.
The superorder consists of 6 families in 2 orders, but Order Pilosa is also divided into two suborders: Folivora (sloths: Choloepodidae and Bradypodidae) and Vermilingua (anteaters: Myrmecophagidae and Cyclopedidae). For a more detailed overview of this suborder and its evolutionary history, check out this video.
Order Descriptions
Click on individual families to expand. You can also view a curated collection of 3D models of various xenarthrans on SketchFab. You may also download a spreadsheet of basic cranial and dental features of all of the xenarthran families:
Order Cingulata
From Latin cingulum- “girdle” (referring to the banded armor of armadillos).
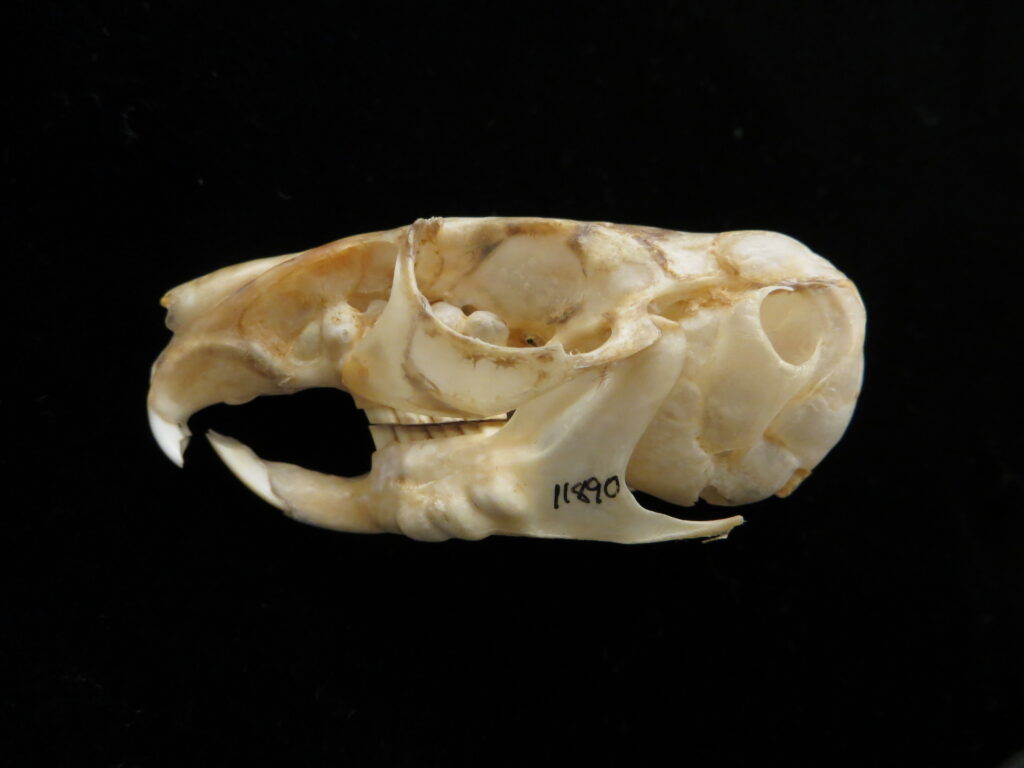
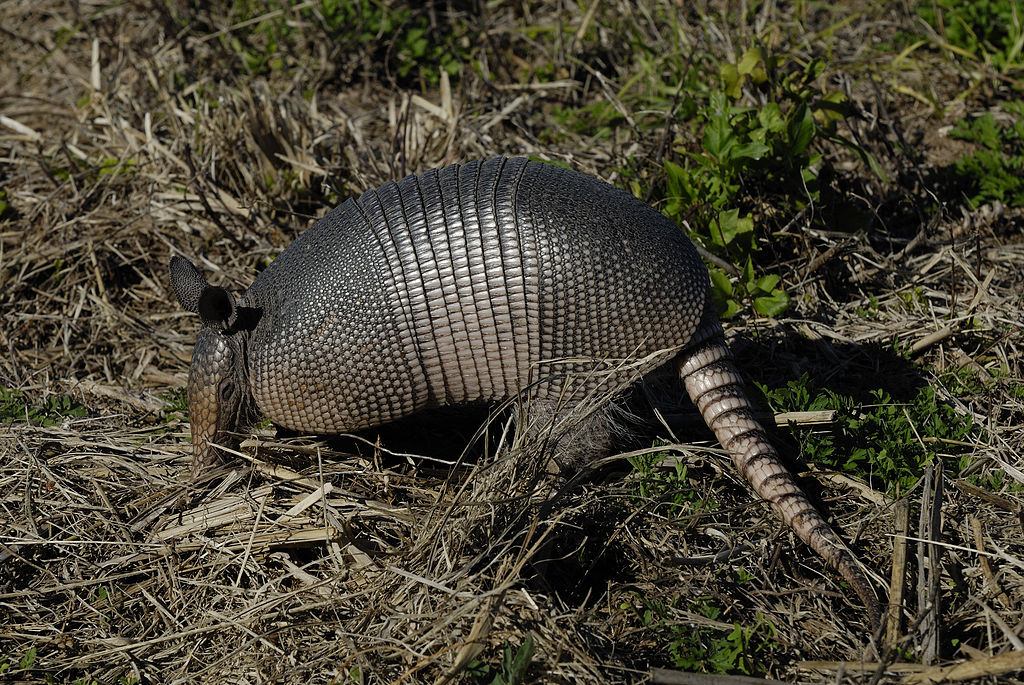
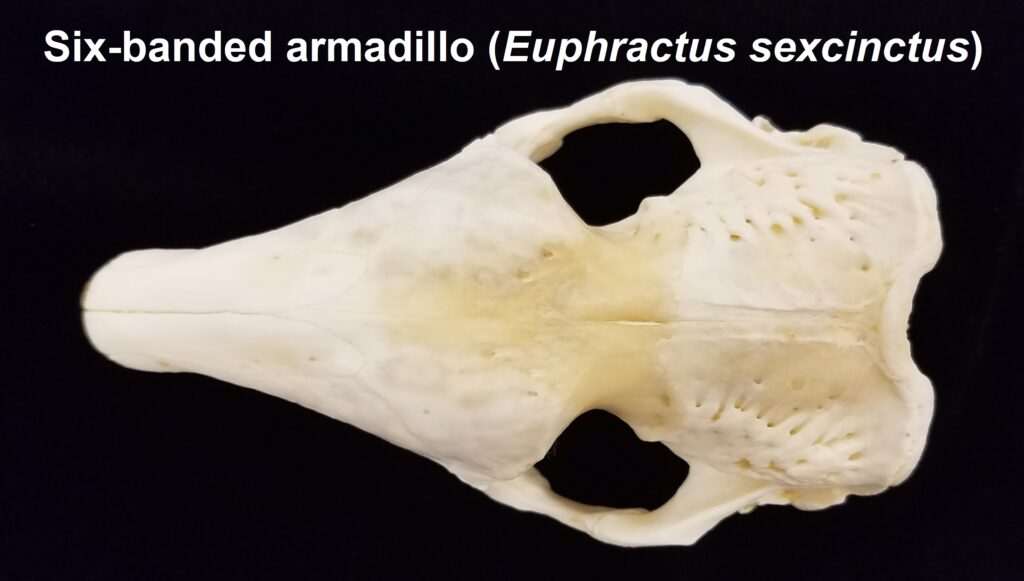
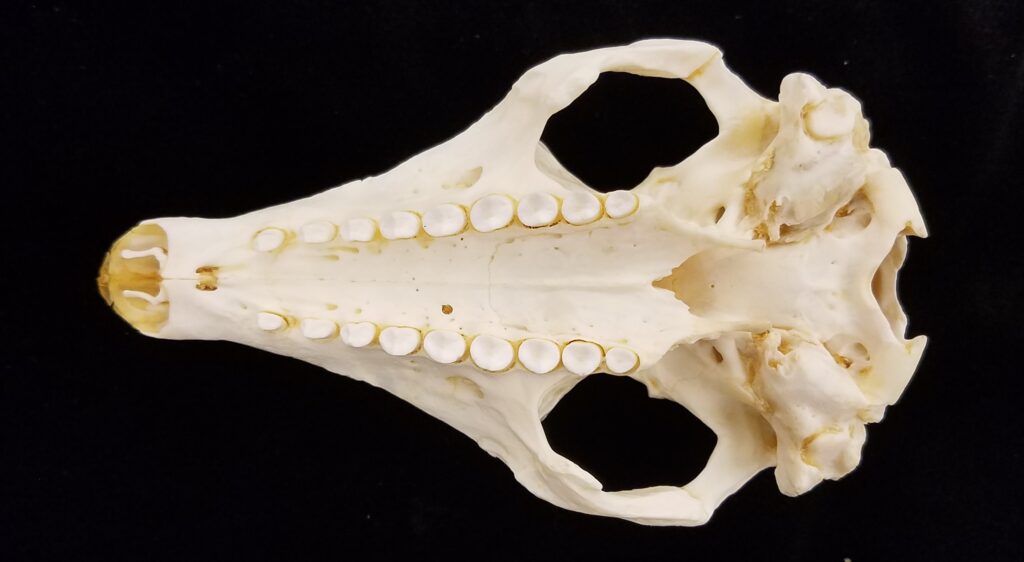
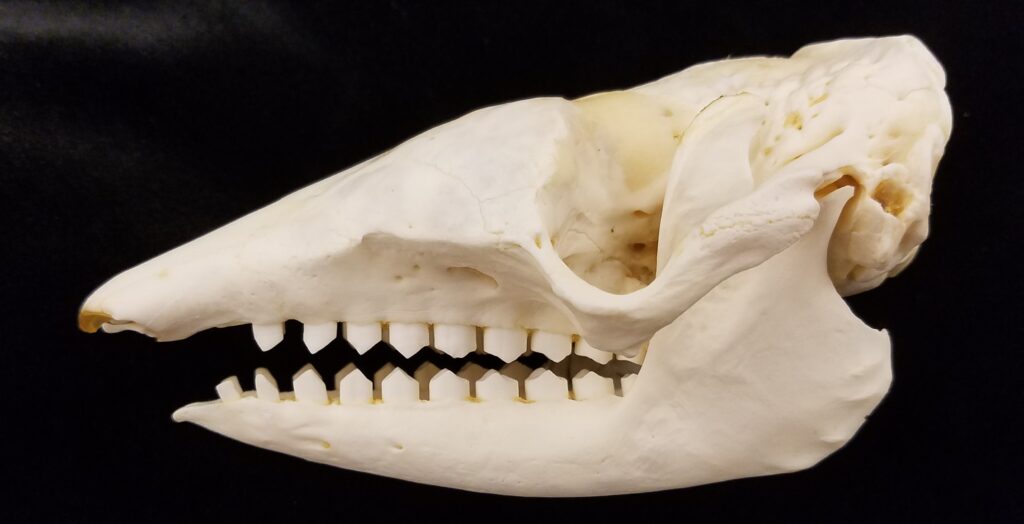
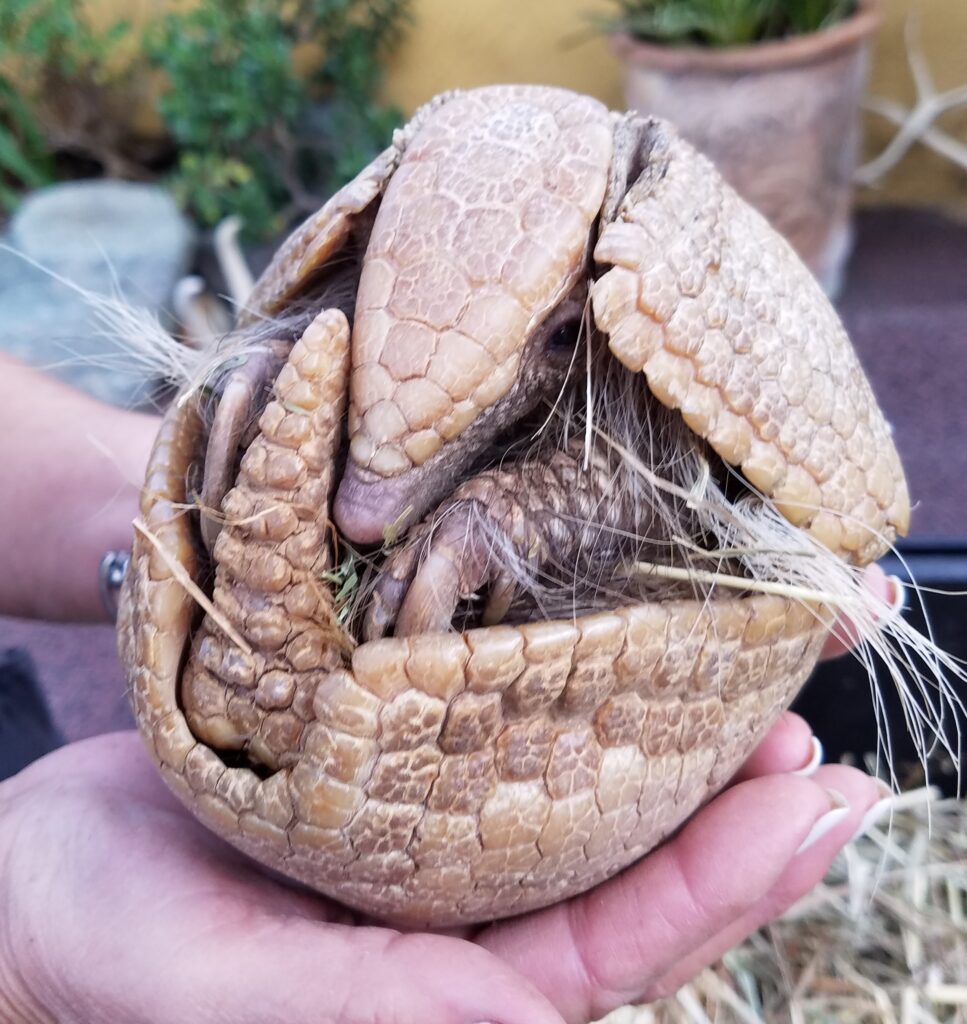
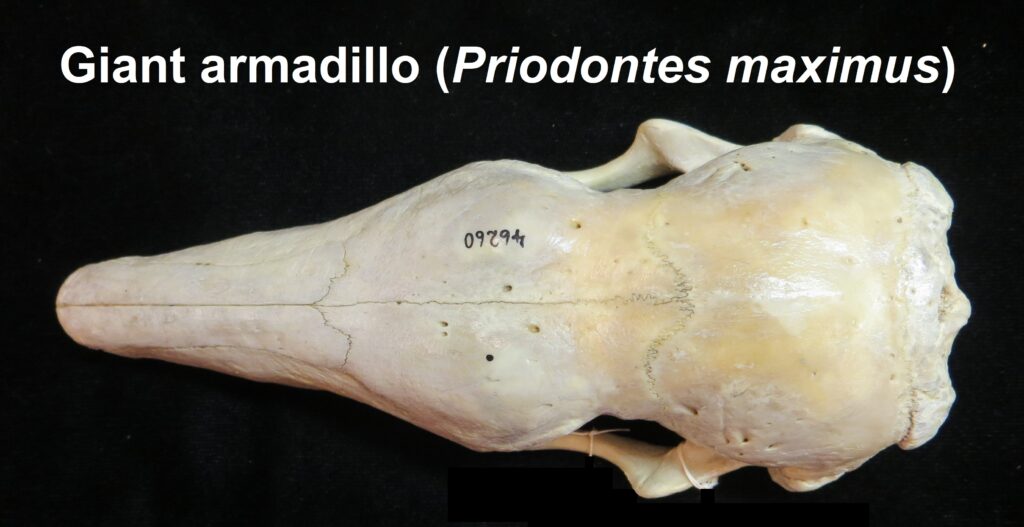
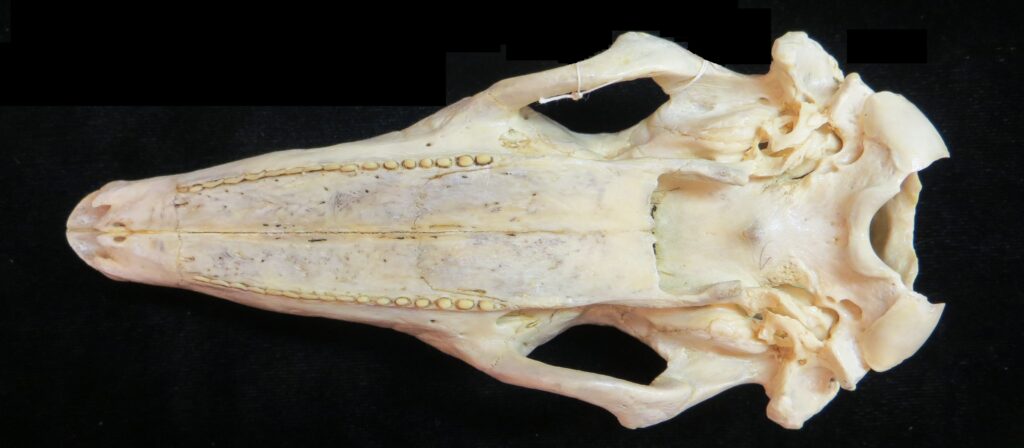
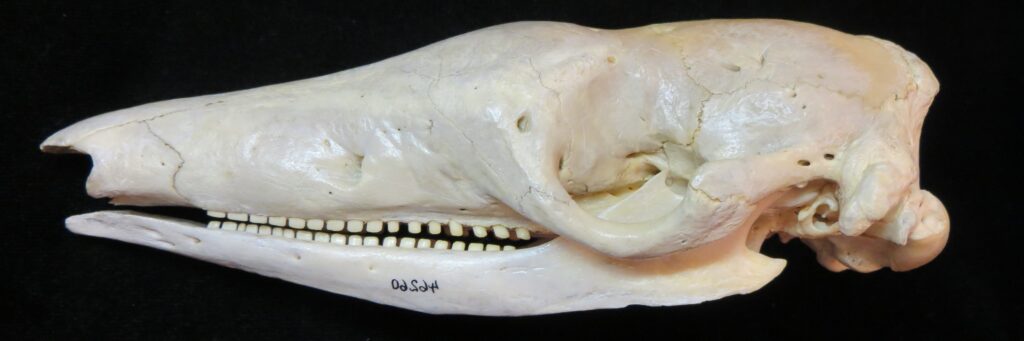
There are two families of living armadillos, which are very similar in morphology and only recently were split into separate taxa based on molecular evidence. They all have and armored carapace covering their head, body, and tail made of bony osteoderms. The osteoderms are derived from the dermis and the carapace is somewhat pliable. This armor protects them from predators when they burrow into the ground (leaving only the armor exposed) or when they curl up to protect their vulnerable ventrum (although only one species can completely roll into a ball). The carapace consists of a head plate; scapular, dorsal, and pelvic shields, and an armor wrapped tail. The dorsal region often consists of moveable bands that give the body flexibility. They have short powerful legs with strong claws to dig while foraging and a long, protrusible tongue to capture invertebrate prey.
Armadillos have no incisors or canines, and their homodont cheekteeth vary in number from 7-8 per quadrant to up to 100 total teeth in the giant armadillo (Priodontes maximus), more than two times as many as any other living land mammal. Their teeth are open rooted and continuously growing throughout life, they lack enamel and are cylindrical in shape and covered in dentin. The occlusal surfaces may be worn flat or beveled to form a chisel-like blade.
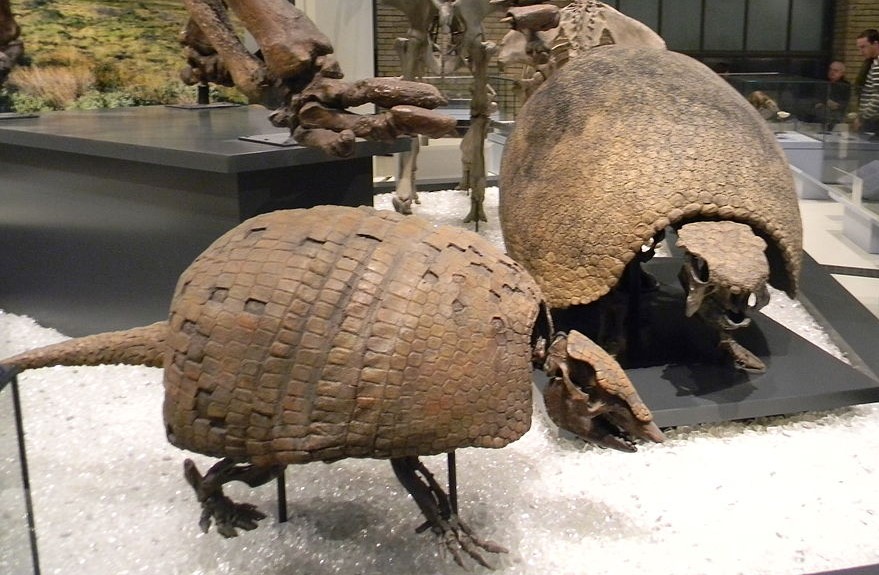
There are two extinct families of cingulates, the pampatheres and glyptodonts. Pamapatheres were very large with giant domed shells, hexagonal osteoderms, and three bands across the back to give them a bit of flexibility. They evolved larger body sizes over time, up to Holmesina, which lived in the Pleistocene of North America and was the size of a small car, weighed over 200kg, and was up to 2m long. They were too large to subsist on an insectivorous diet, so they were primarily grassland grazers. Glyptodonts also had large domed carapaces but were not flexible, and some had spiked club-like tails for battling opponents. Glyptdonts evolved in the early Miocene in South America. They too were grazers and could reach even larger sizes than pampatheres (Glyptodon: 2000kg and more than 3.3m long). Both families went extinct by about 10K years ago at the end of the last Ice Age.
By Laslovarga, CC BY-SA 3.0, via Wikimedia Commons
Family Dasypodidae
Family Dasypodidae
From Greek dasys- “hairy” and pous “foot” (referring to the hairy feet of armadillos).
Long-nosed armadillos
1 genus, 8 species
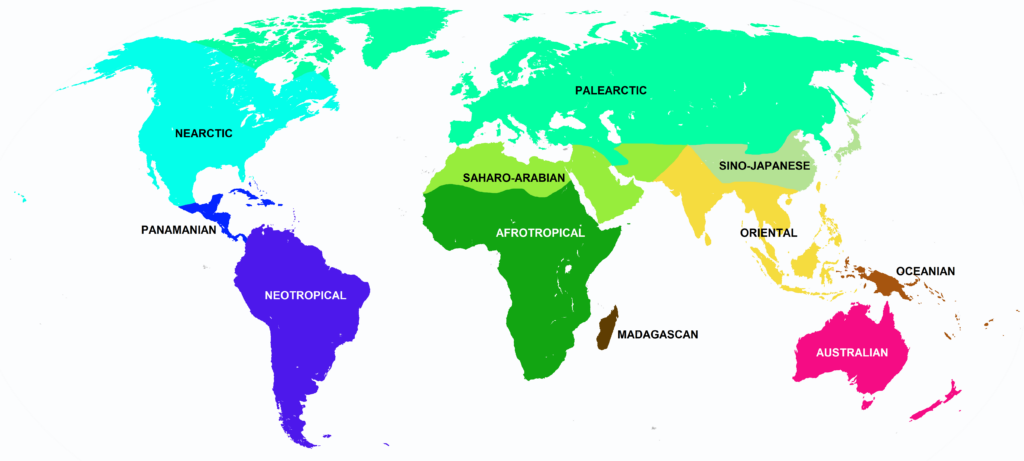
Nearctic, Panamanian, Neotropical Zones
- Smallish body covered in armored carapace
- Carapace more rounded at the ventral edges than chlamyphorids, banding more distinct
- Tibia/fibula fused with expanded muscle insertions
- Elongate skull, slightly more than chlamyphorids
- Zygomatic arch complete
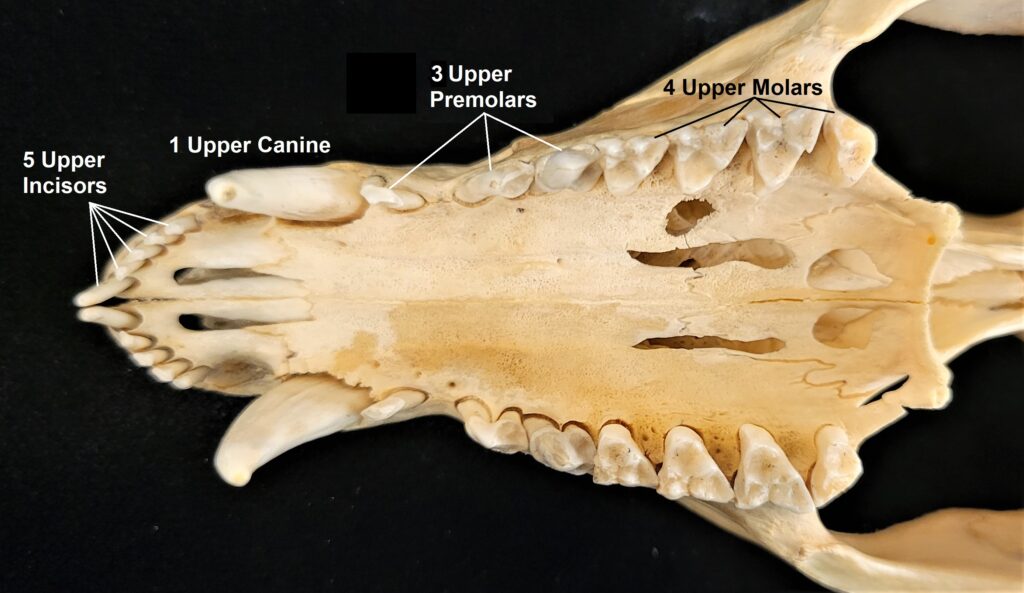
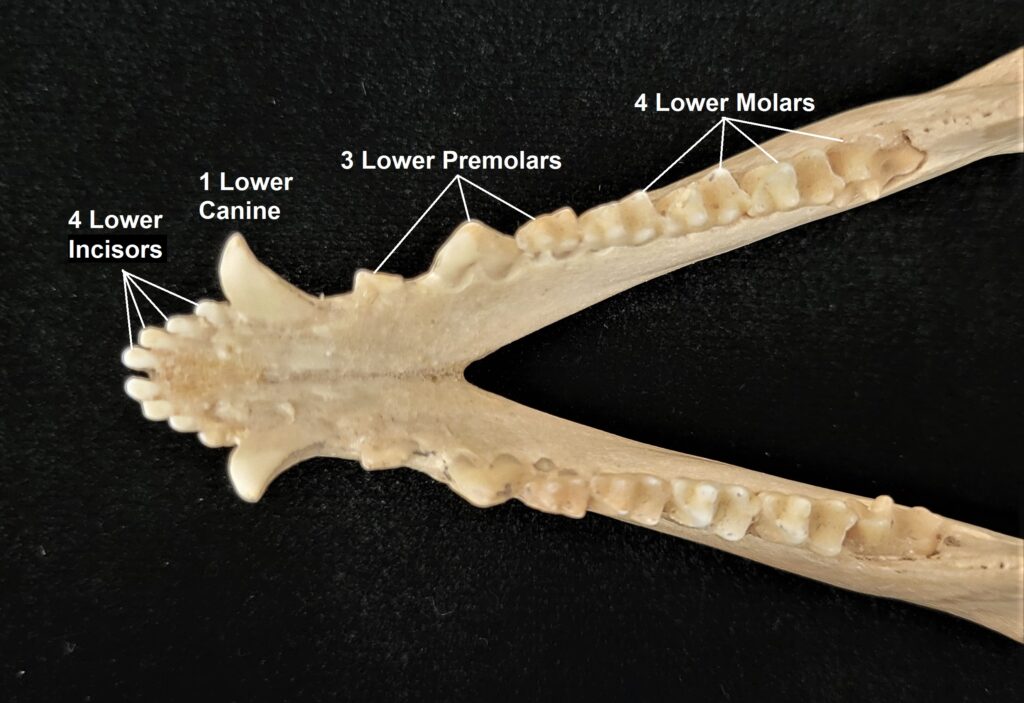
- Teeth 0.0.[7-18]/0.0.[7-19]
- Homodont cheek teeth
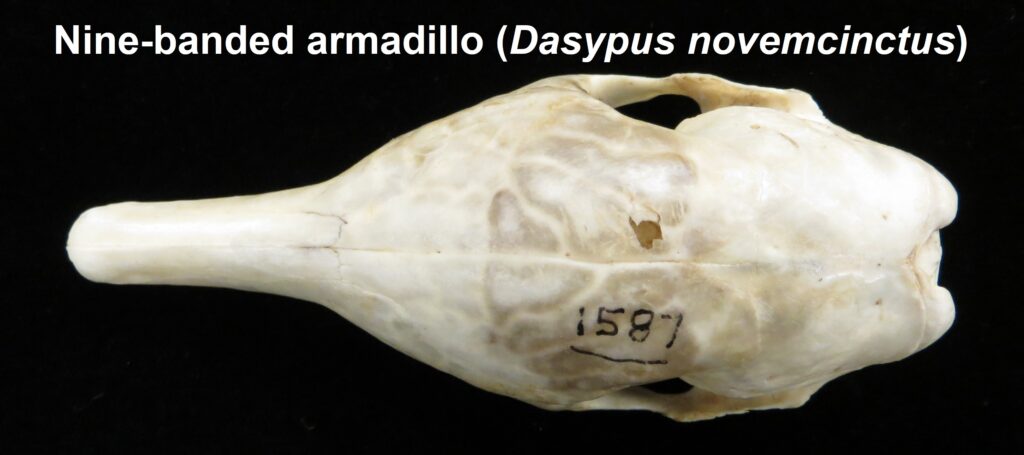
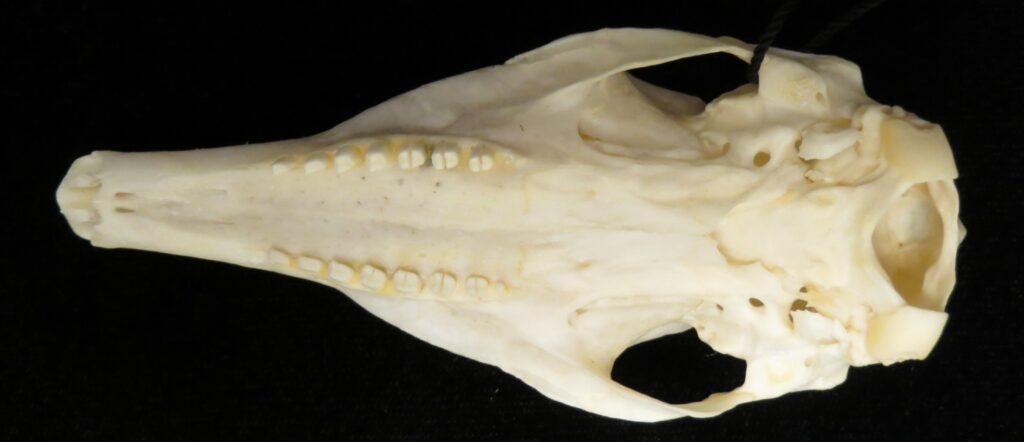
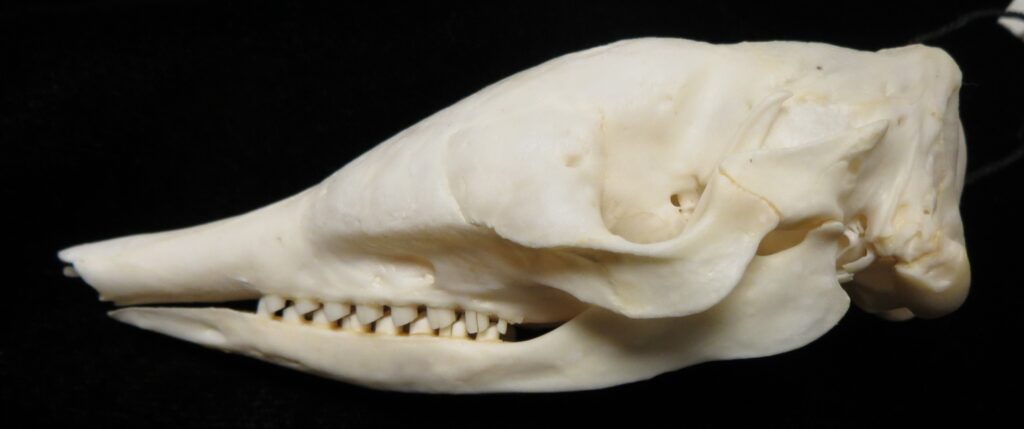
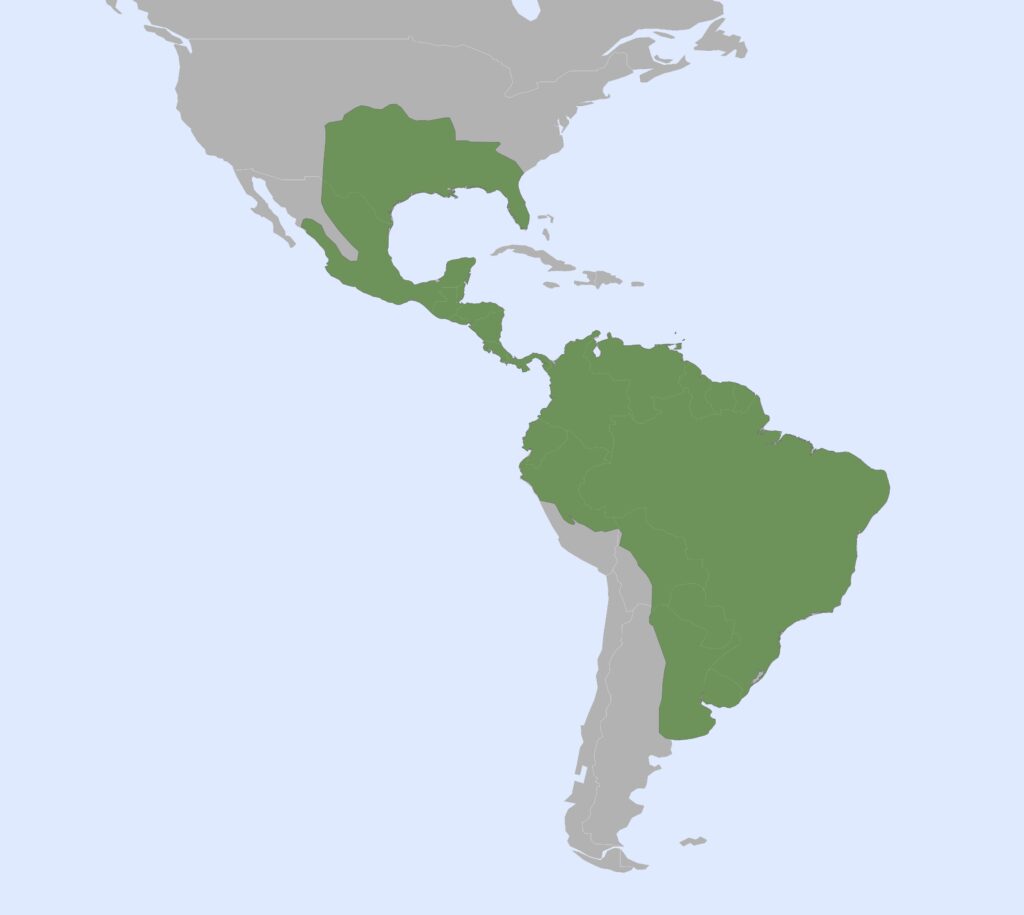
Long-nosed armadillos are small- to medium-sized, with a long snout and peglike teeth. They live in savannas, forests, and riparian areas in North and South America. The nine-banded armadillo (Dasypus novemcinctus) has the widest geographical range of all armadillos, from northern South America to the southeast United States, and is the only Xenarthran found in North America. They are somewhat less morphologically diverse than chlamyphorid armadillos with all species belonging to a single genus (Dasypus). The spines on the scapula, large processes on the humerus, and long olecranon process of the ulna all serve as attachment sites for muscles used in digging.
By Hans Stieglitz, CC BY-SA 3.0 , via Wikimedia Commons
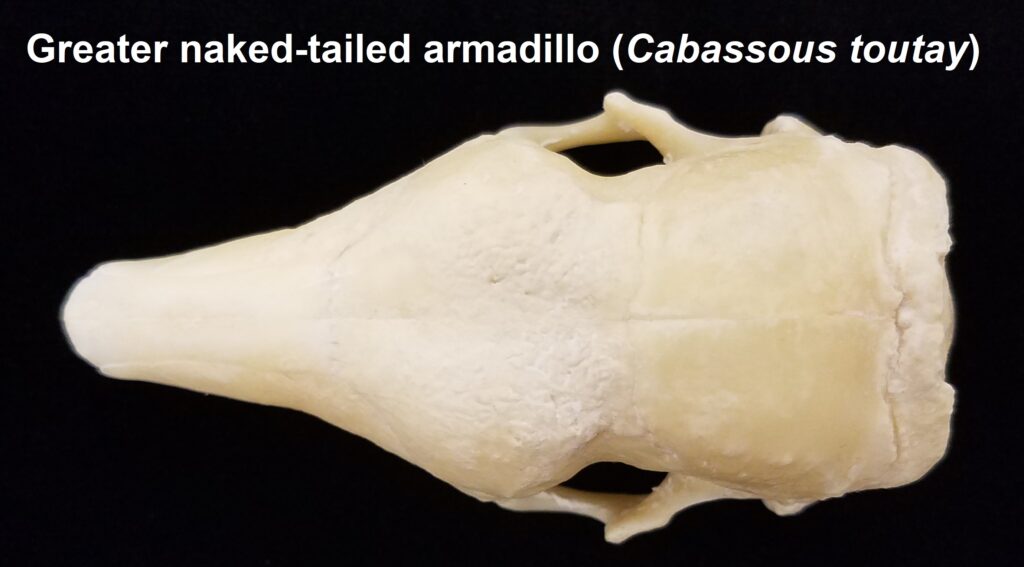
Family Chlamyphoridae
Family Chlamyphoridae
From Greek chlamys- “cloak” and phoros “bearing” (referring to the armored covering of these armadillos).
Chlamyphorid armadillos
8 genera, 14 species
Panamanian, Neotropical Zones
- Small to large bodies covered in armored carapace
- Carapace flatter and less rounded at ventral edges with less distinct central banding than dasypodids
- Tibia/fibula fused with expanded muscle insertions
- Elongate skull, but more broad posteriorly than dasypodids
- Zygomatic arch complete
- Teeth 0.0.[7-50]/0.0.[7-50]
- Homodont cheek teeth
Chlamyphorid armadillos are small- to large-sized, with a shorter snout than dasypodids and peglike or chisel-like teeth. They live in savannas, forests, pampas and arid deserts ranging from the humid tropics to the cold temperate zones in Central and South America. They can be insectivorous, omnivorous, or even carnivorous at times. They are much more morphologically diverse than dasypodids. The pink fairy armadillos (Chlamyphorous) are very small, more elongate in body shape, and their armor only covers their dorsum like a cape, with the lateral surfaces of the body being more exposed. On the other hand, the giant armadillos (Priodontes maximus) are large tropical species weight up to 45kg with a full coat of thick armor.
Order Pilosa
From Latin pilosus- “hairy” (referring to the dense fur of sloths and anteaters).
Suborder Vermilingua
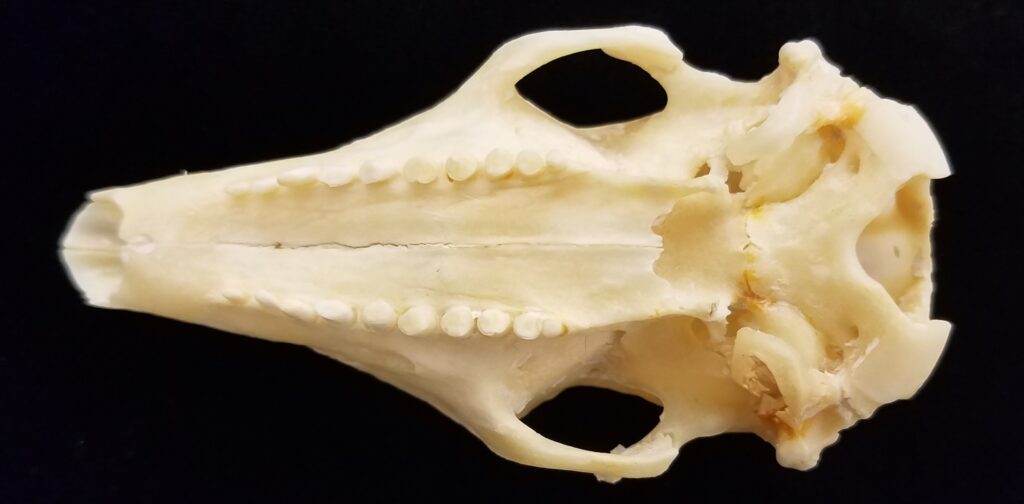
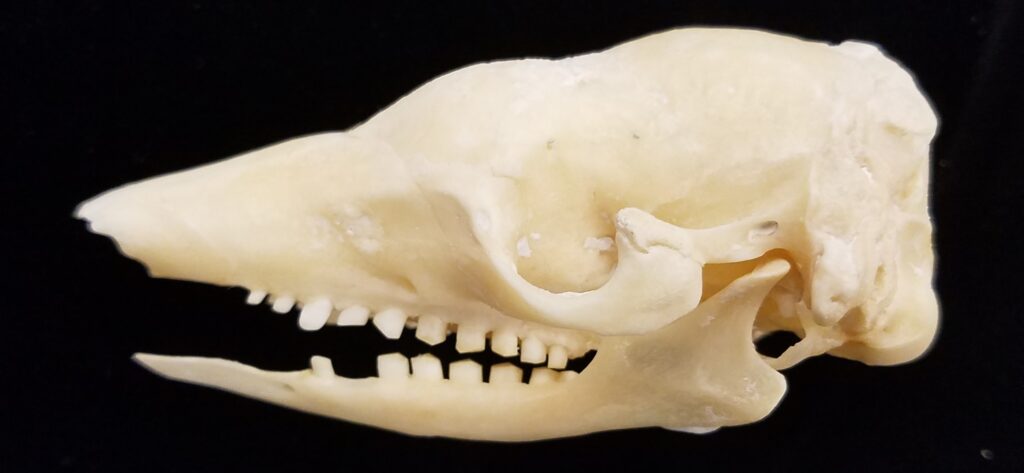
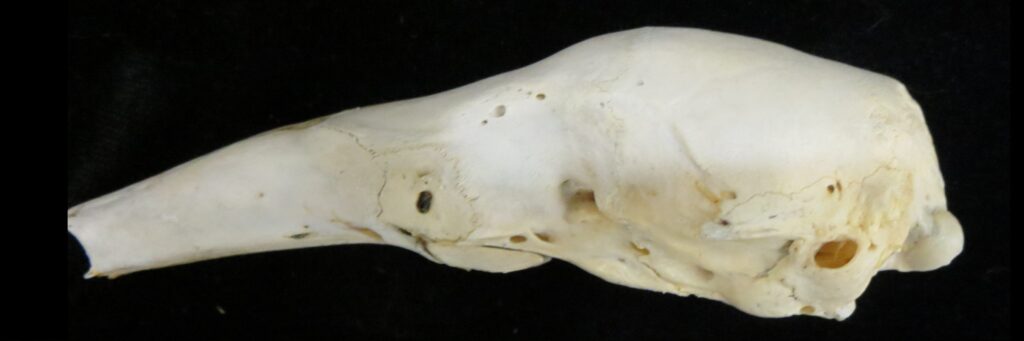
The anteaters have several characteristics that distinguish them from other xenarthrans. All species lack teeth, have a very long protrusible tongue (vermilingua = “wormlike”) for capturing prey, and have curved, elongated skulls with incomplete zygomatic arches. These traits allow them to easily extract termites and ants from nests after excavating them with large claws and powerful forelimbs.
The oldest anteater fossil (Protamandua) dates to the early Miocene in Argentina and shows the elongated skull and lack of teeth found in extant anteaters, but not the curved rostrum. The fossil record of anteaters is very poor and not much is known about their history.
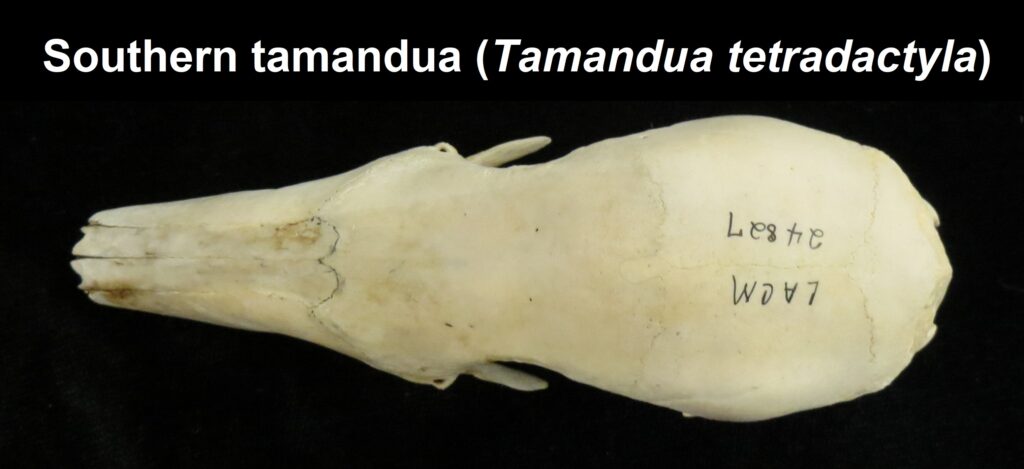
Family Myrmecophagidae
Family Myrmecophagidae
From Greek myrmex- “ant” and phagos “eater” (referring to their specialized diet of ants and termites).
Anteaters, Tamanduas
2 genera, 3 species
Panamanian, Neotropical Zones

- Mid-sized to large bodies with long tubular snout
- Small eyes and large, strong claws
- Larger in size than Cyclopedidae
- Elongated downward sloping skull
- Incomplete or absent zygomatic arch
- Edentate (toothless)
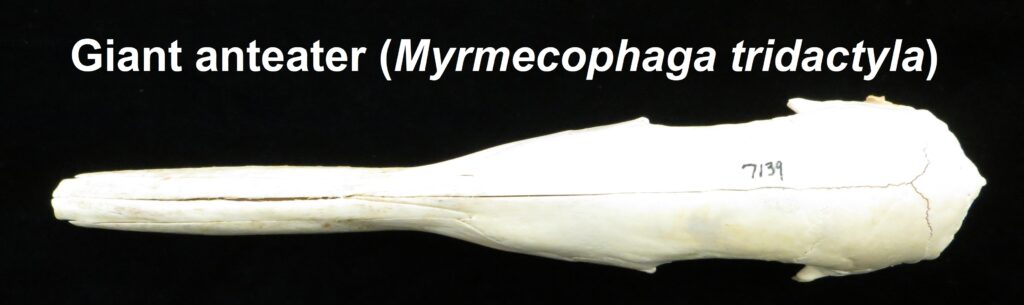
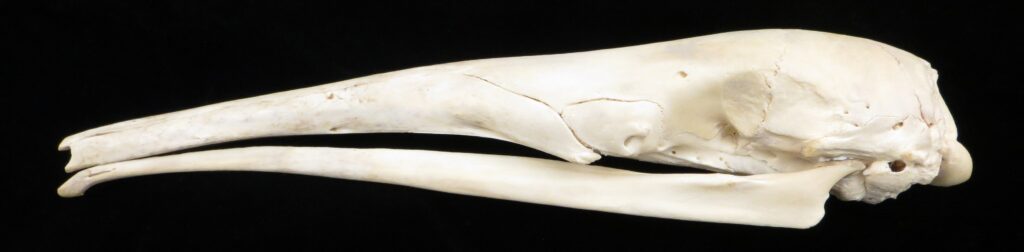
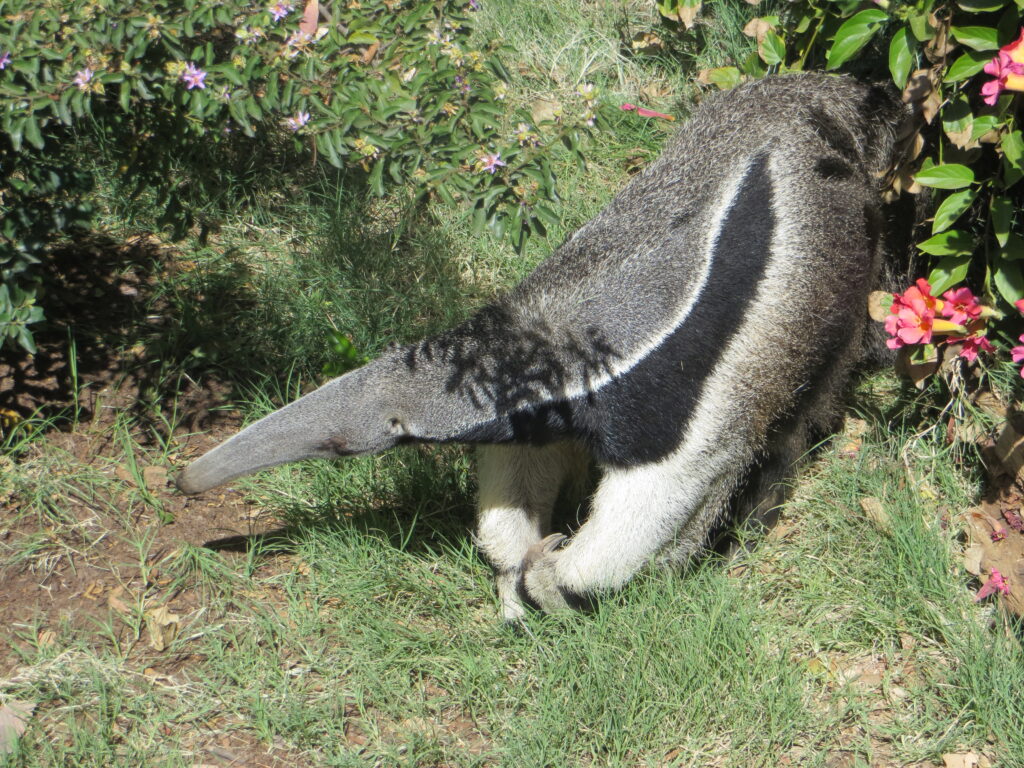
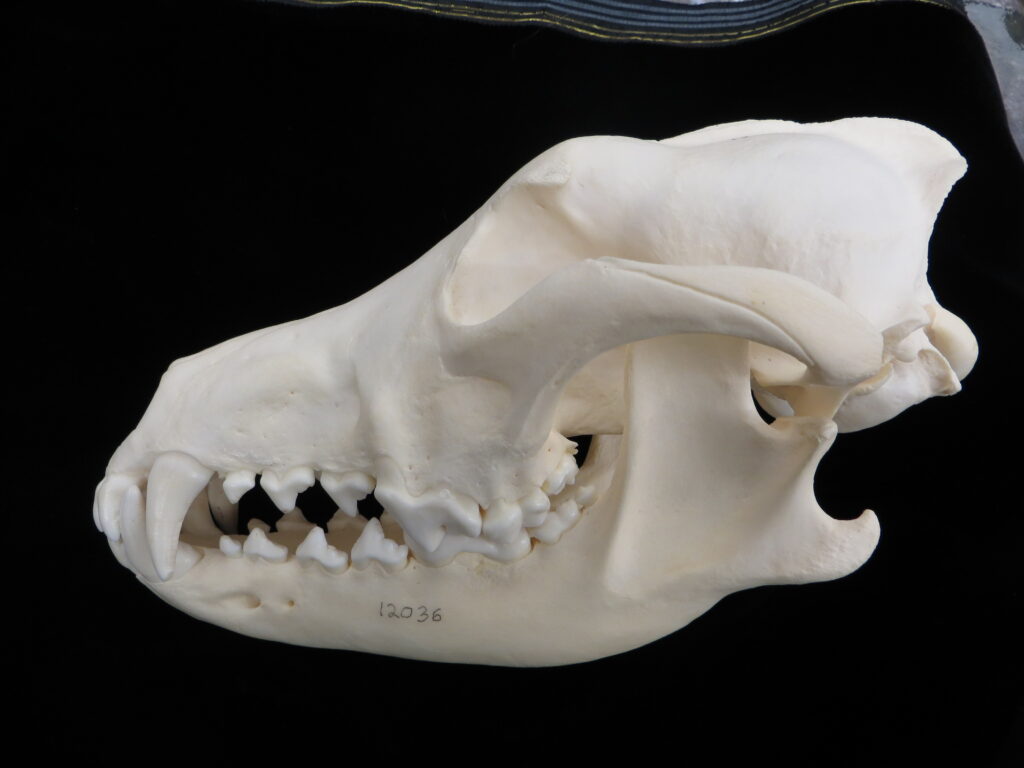
Anteaters and tamanduas have lost all teeth, have an acute sense of smell, a long protrusible tongue attached to the sternum, a small mouth, large salivary glands to produce sticky saliva, and sharp powerful claws for tearing open termite and ant nests. Giant anteaters are very large (up to 39kg) with long, coarse hair, very large foreclaws, and powerful forelimbs to dig up ant and termite mounds, but also capable of killing a jaguar in defense. Their tongue can extend and retract up to 160 times per second and they can eat up to 35,000 ants per day. They range from Mexico down to Argentina, living in forests, savannas, steppes, and grasslands. Giant anteaters are more terrestrial while tamanduas are smaller and more scansorial with prehensile tails.

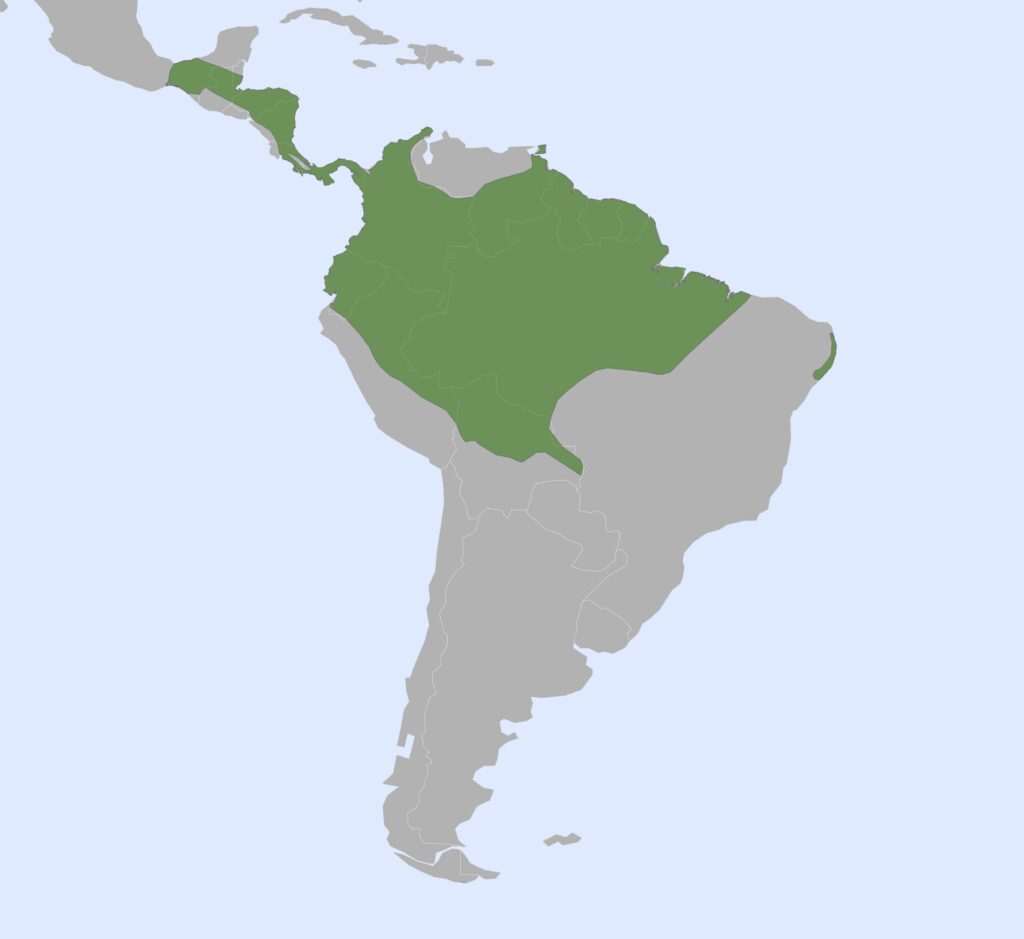
Family Cyclopedidae
Family Cyclopedidae
From Greek kyklos- “circle” and pous “foot” (referring to the small, rounded feet of silky anteaters).
Silky Anteaters
1 genus, 7 species
Panamanian, Neotropical Zones
- Mid-sized bodies with light silky fur
- Smaller in size than other anteaters
- Large eyes, large claws
- Elongated downward sloping skull, but less so than other anteaters
- Incomplete or absent zygomatic arch
- Edentate (toothless)
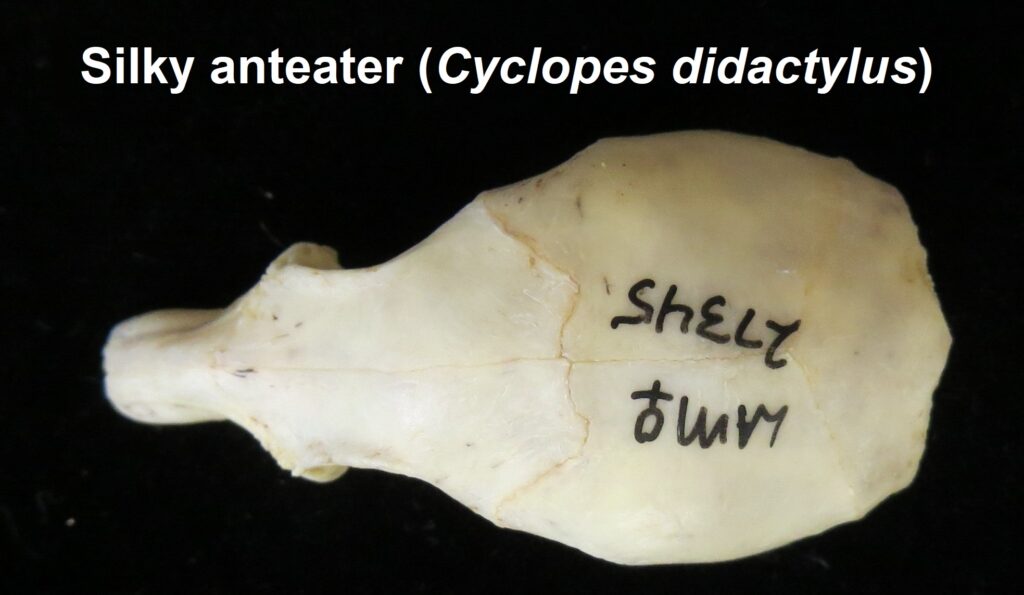
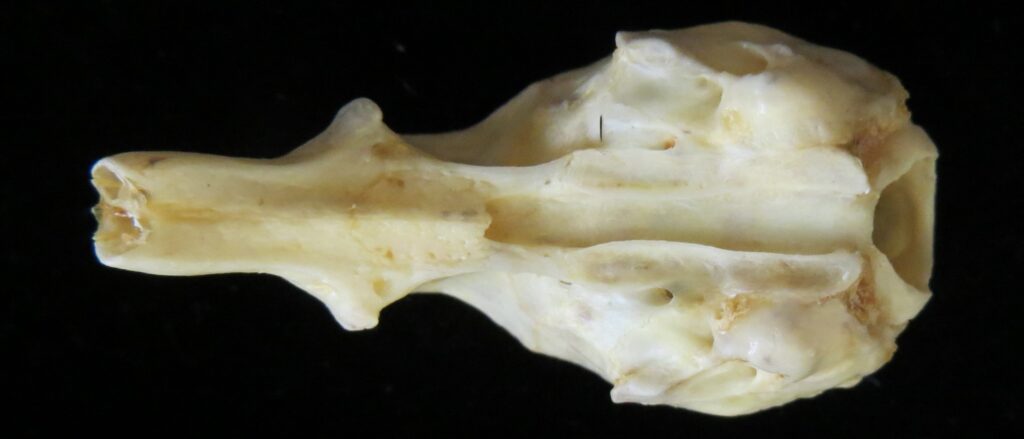
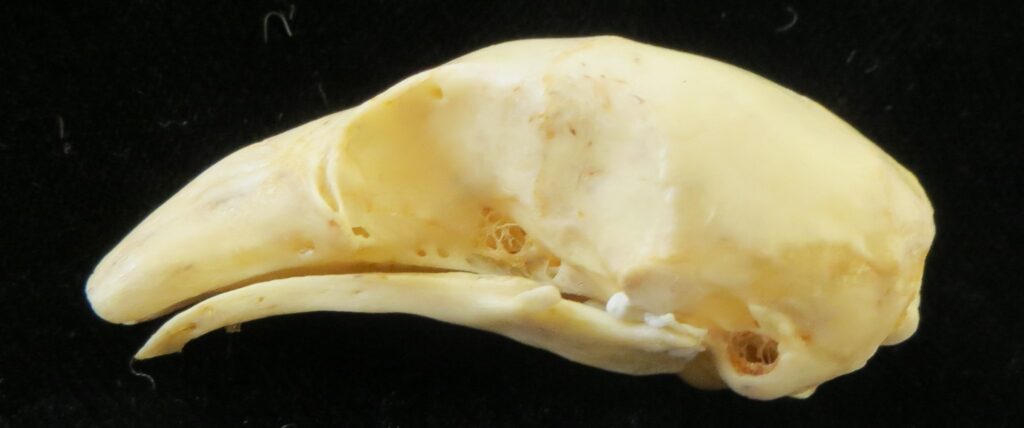
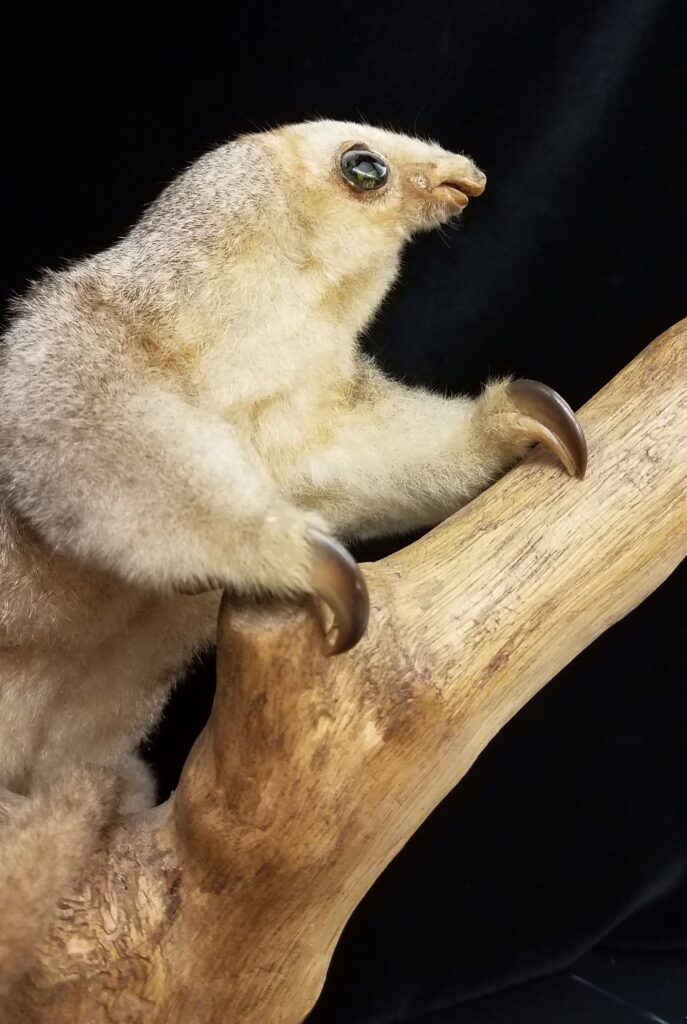
Silky anteaters are arboreal, living in forests from Brazil to Mexico. They are much smaller than myrmecophagids (up to 400g), specializing on ants but also eating some termites and beetles. They have long tails with a partially hairless tip for climbing through trees. They are easily distinguished by their smaller size and light silky fur.
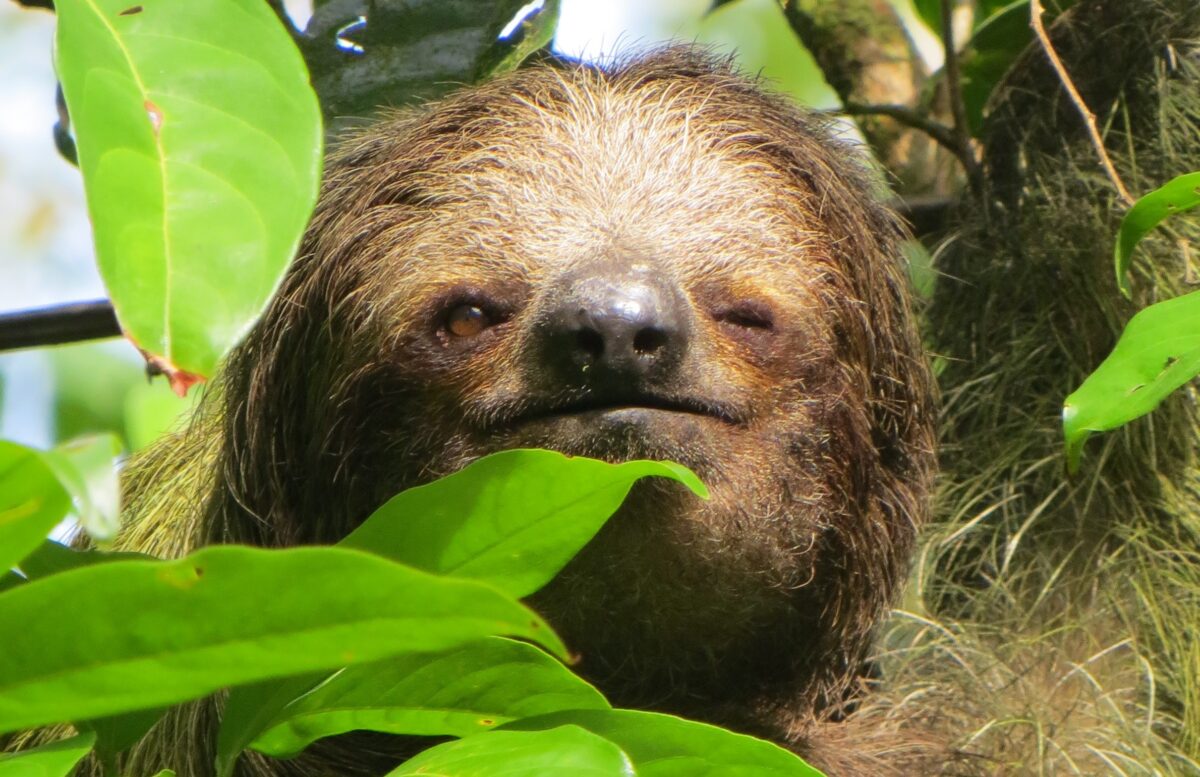
Suborder Folivora
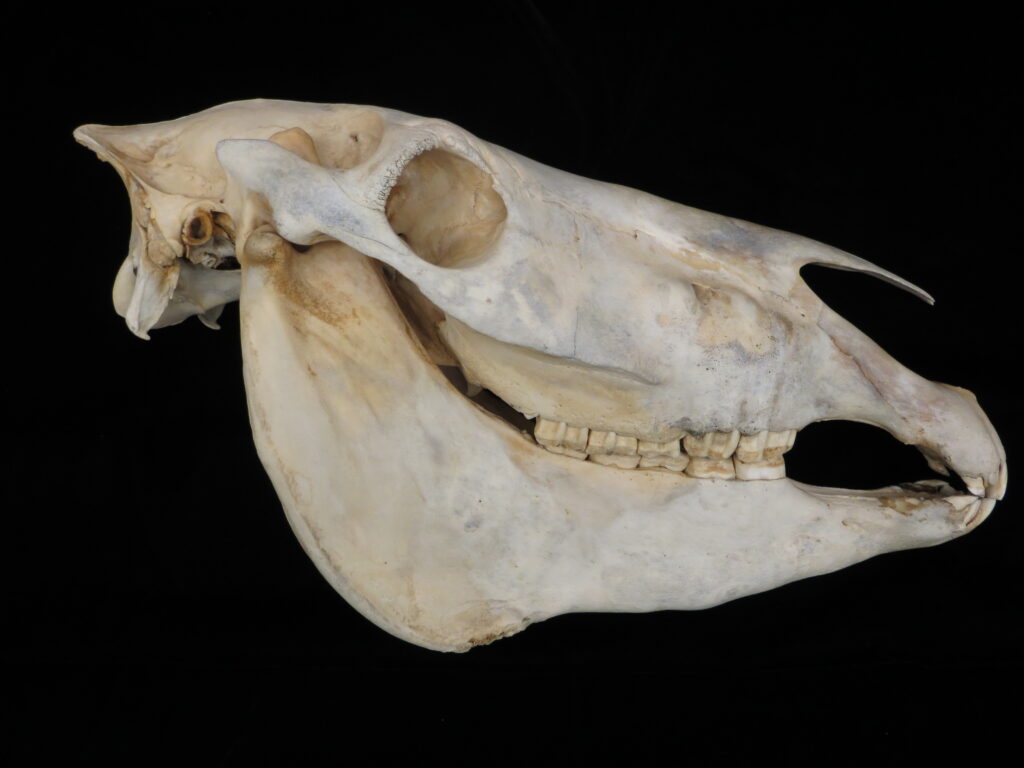
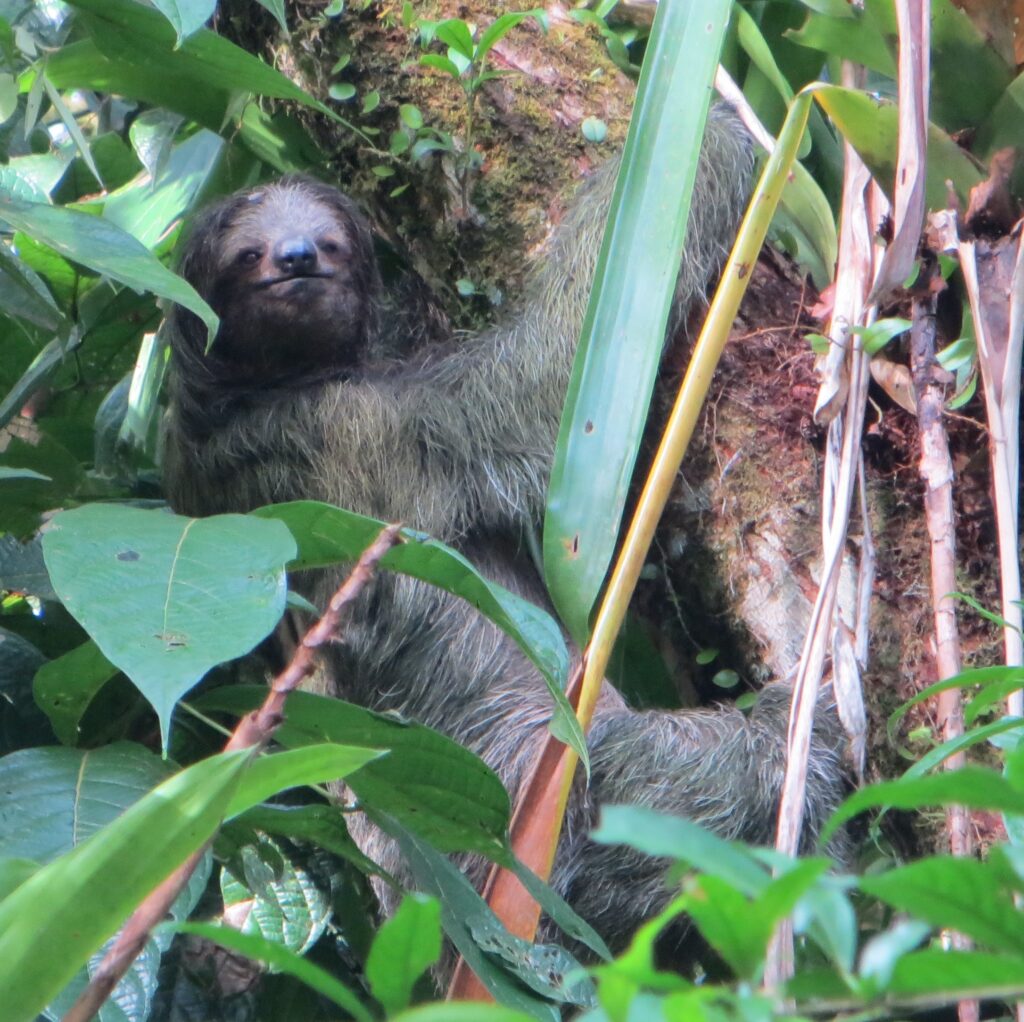
Sloths, unlike other xenarthrans, have short, squarish rostra and very short tails. All extant species are tree sloths that move slowly through the canopy, using suspensorial locomotion with longer forelimbs than hindlimbs. They are folivores (i.e., leaf-eaters), climb down out of the trees to defecate, are surprisingly good swimmers, and have coarse fur that provides a home for green algae that helps to camouflage them in the canopy. While they only eat leaves, they have a very low metabolism and low body temperature, which reduces their energetic requirements.
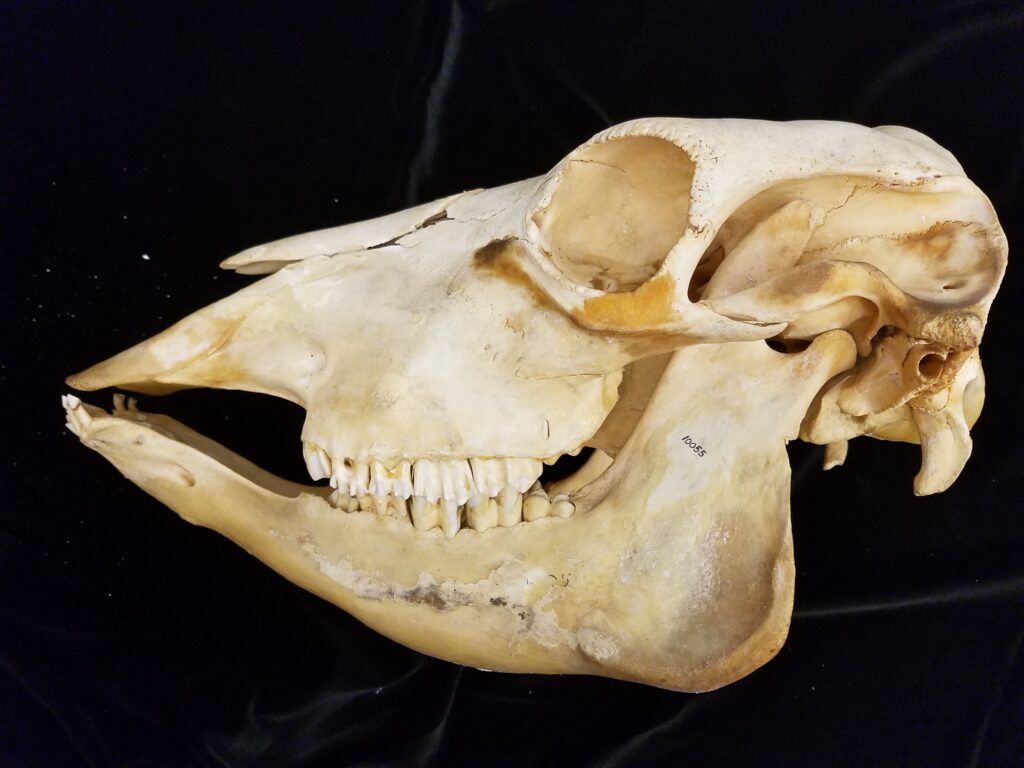
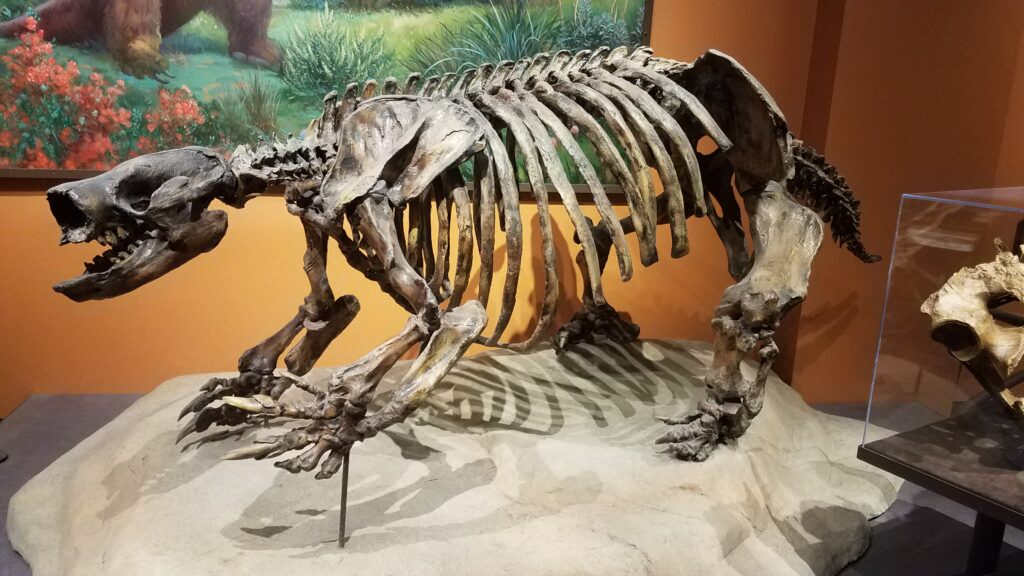
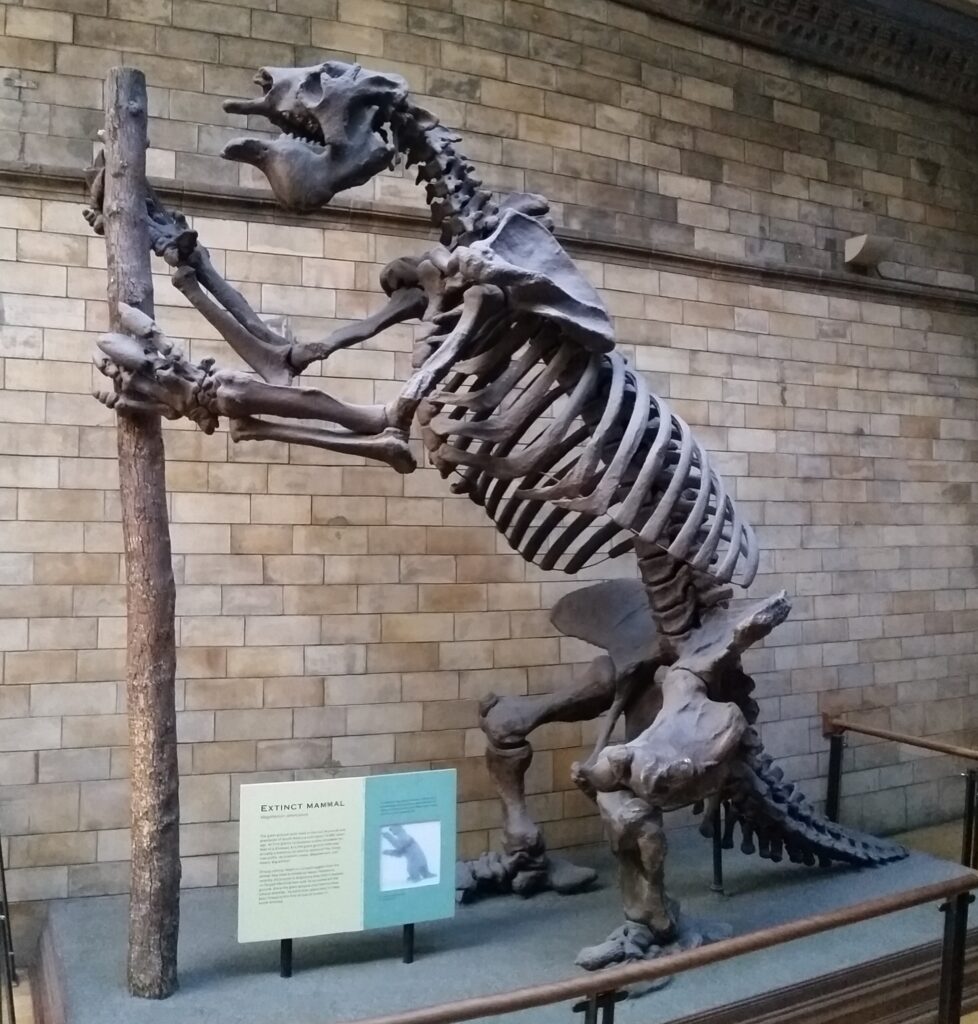
In contrast to anteaters, sloths have a deep and hugely diverse fossil record. Ground sloths are not that closely related to the extant taxa. They were large in size with powerful forelimbs and claws that were probably used to pull tree limbs down so they could strip leaves off with their long tongues. There are four families of grounds sloths ranging from South America well up into the southern portions of the United States. Paramylodon (image below) stood nearly 4m tall and weighed around 1000kg; Thalassocnus was fully aquatic, showing dense bones, claws for clinging to rocks, and teeth adapted for eating sea grass and algae; Megatherium (image below) was an elephant-sized ground sloth standing 6m tall and weight up to 4000kg. All ground sloths were extinct by the end of the last Ice Age 10,000 years ago due to overhunting by humans and a rapidly changing climate.
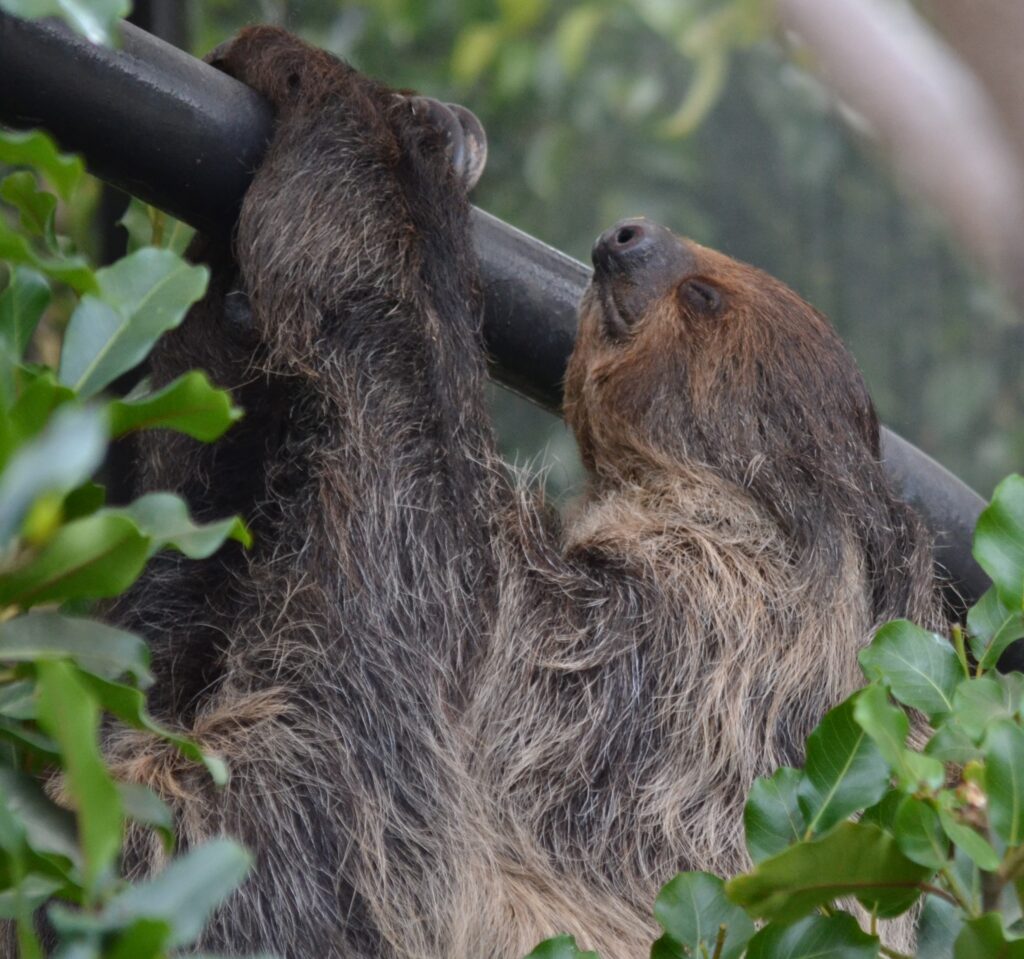
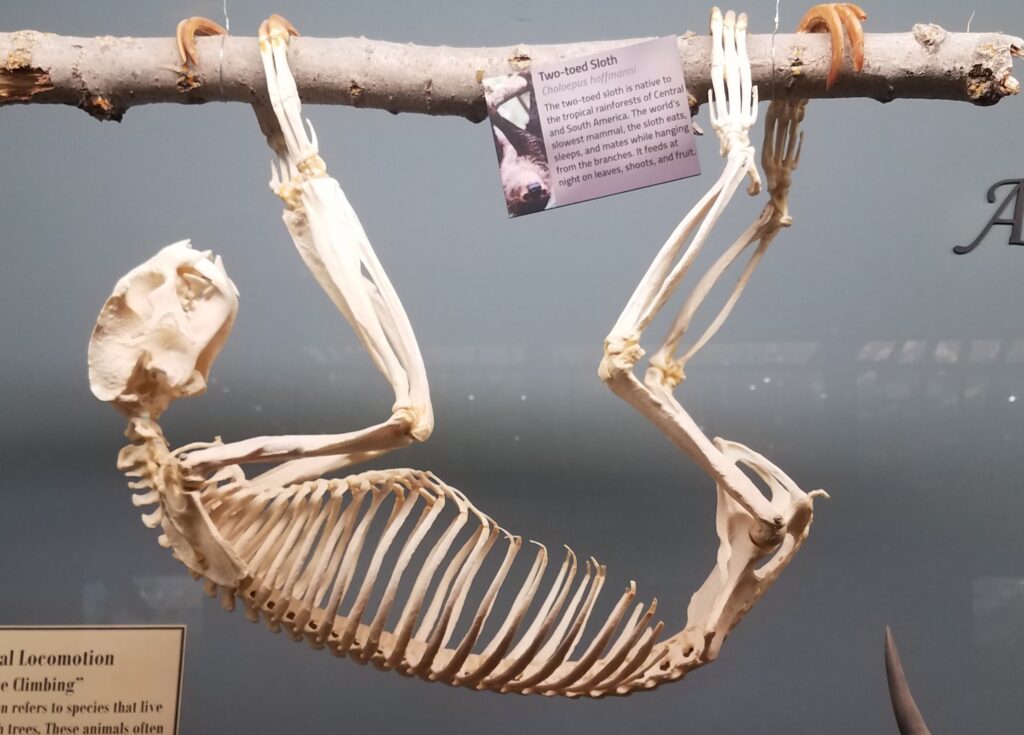
Family Choloepodidae
Family Choloepodidae
From Greek cholos- “lame” and pous “foot” (referring to their slow, deliberate movement).
Two-toed sloths
1 genus, 2 species
Panamanian, Neotropical Zones
- Mid-sized bodies with 2 digits on forefeet
- Long, curved claws for suspensorial locomotion
- Long coarse fur
- Naked, fleshy nose
- Incomplete zygomatic arch
- Forked jugal
- Shallow dentary with small angular process
- Teeth 0.0.[5]/0.0.[4-5]
- Caniniform premolar
- Peg-like cheekteeth with deep basin and sharp ringed edge
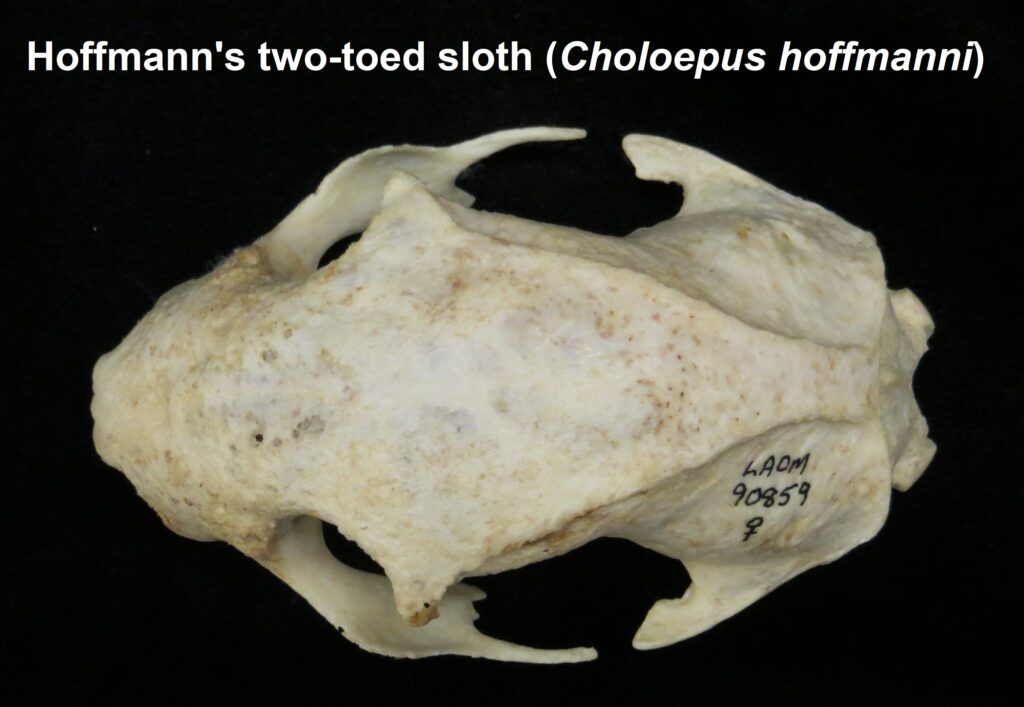
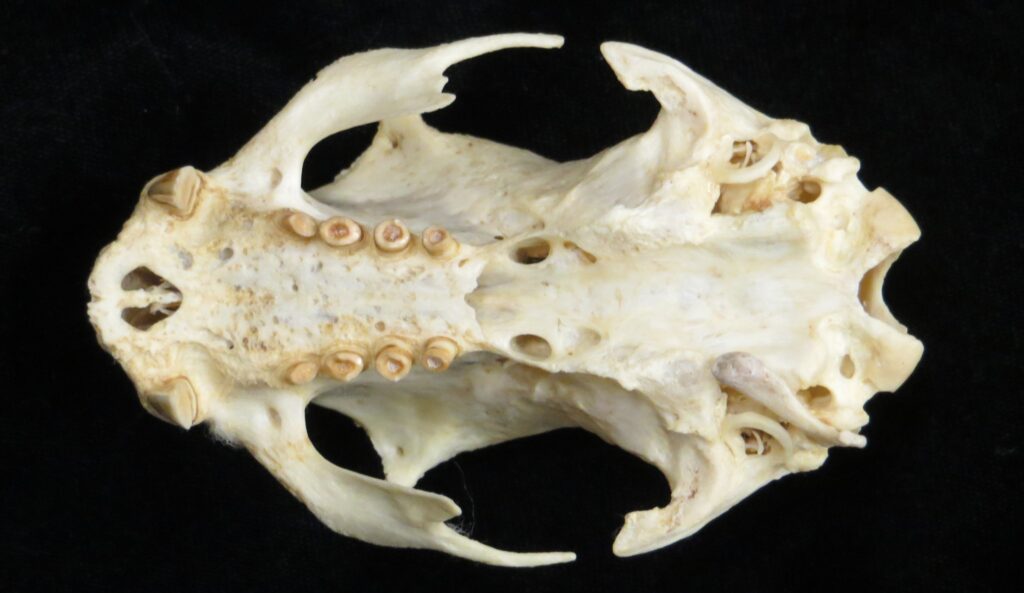
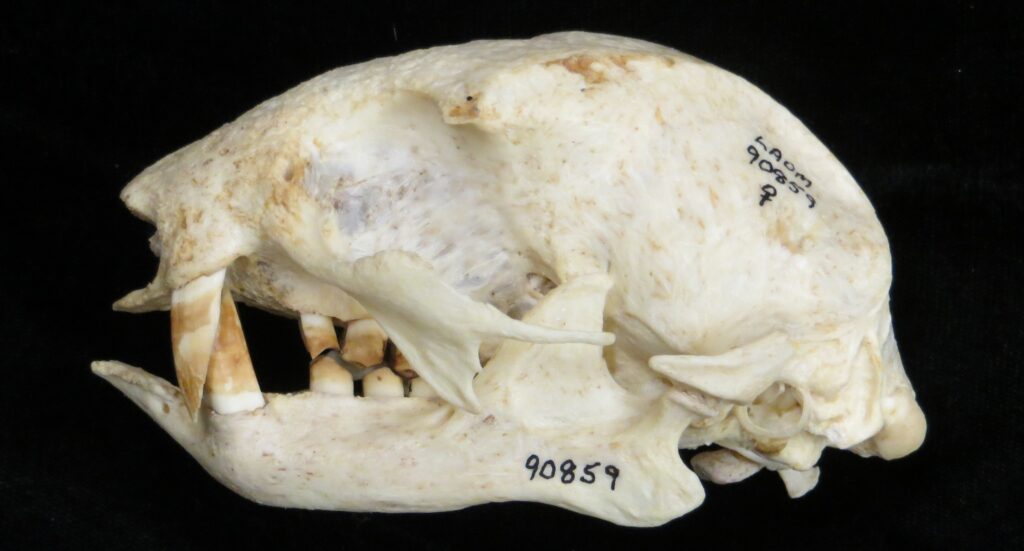
Two-toed sloths have caniniform teeth that occlude on the anterior face of the lower teeth, allowing the teeth to self-sharpen as they wear down. The cheekteeth lack enamel, with a core of dentin and outer layer of harder orthodentin. As these wear down, they produce occlusal surfaces with a raised perimeter and deep basin in the center.
These sloths weigh 4-9kg, are larger than bradypodid sloths, and are mainly folivorous with only two clawed digits on the syndactylous forefeet (all sloths have three claws on the hindfeet). They live in tropical and montane forests.
Family Bradypodidae
Family Bradypodidae
From Greek bradys- “slow” and pous “foot” (referring to their slow, deliberate movement).
Three-toed sloths
1 genus, 5 species
Panamanian, Neotropical Zones
- Mid-sized bodies with 3 digits on forefeet
- Long, curved claws for suspensorial locomotion
- Long, coarse fur
- Naked, fleshy nose
- Incomplete zygomatic arch
- Forked jugal
- Deep dentary with enlarged angular process
- Teeth 0.0.[5]/0.0.[4-5]
- No caniniform premolar
- Peg-like cheekteeth with deep basin and sharp ringed edge
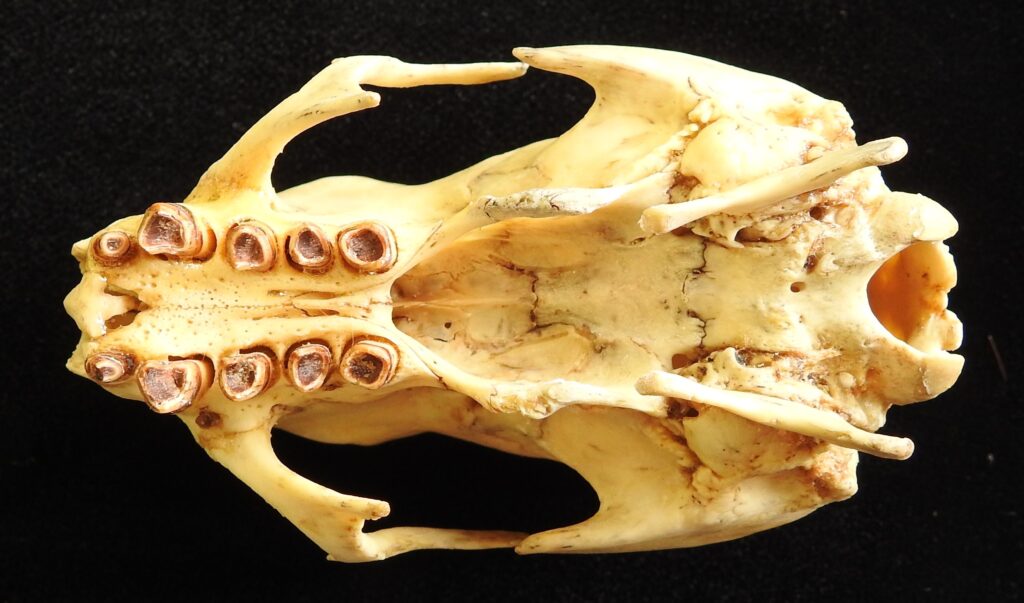
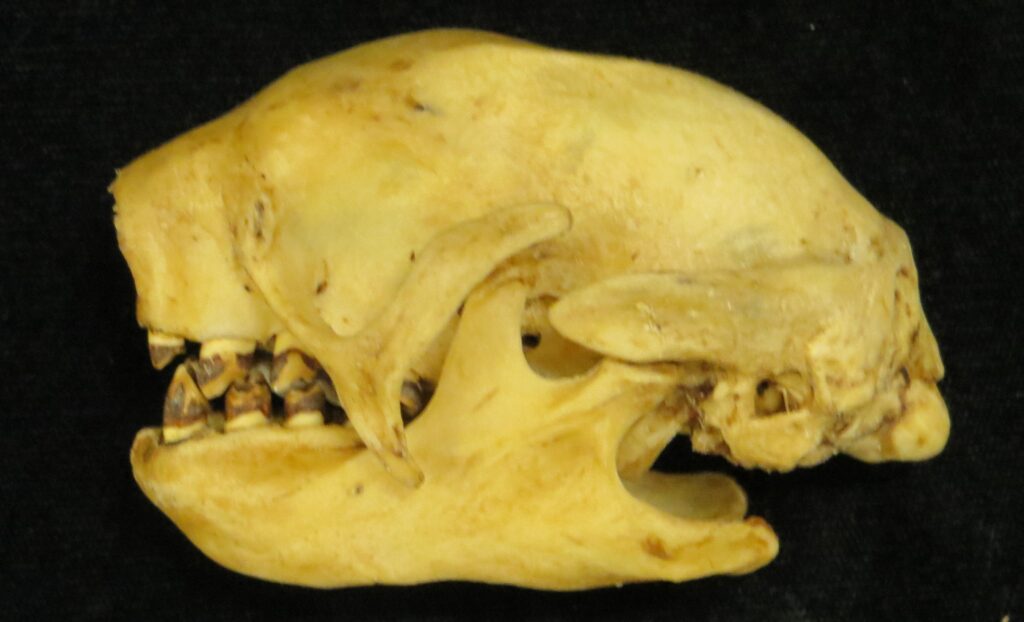
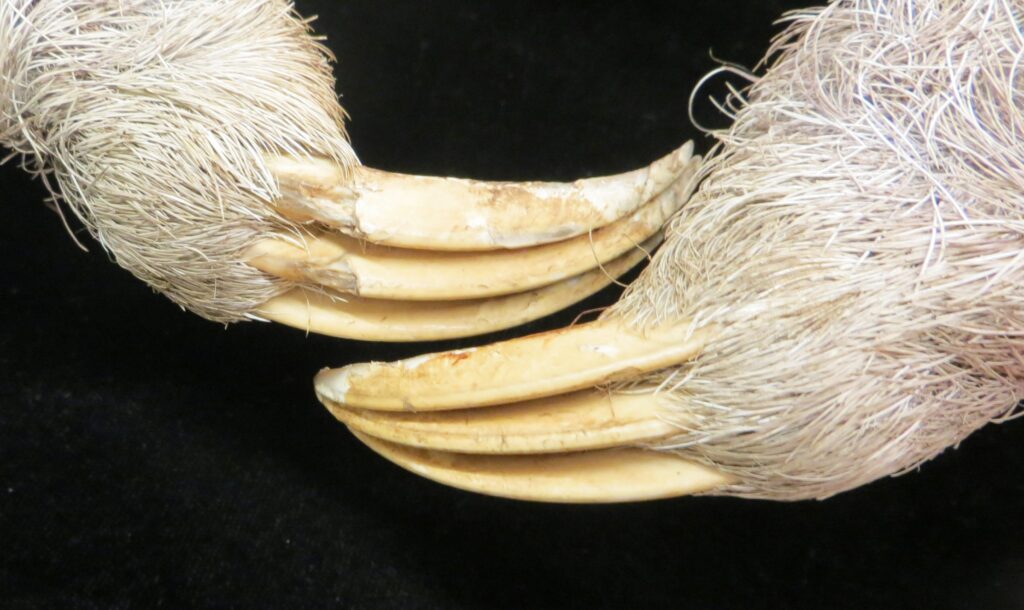
Three-toed sloths have no caniniform teeth, a mandibular condyle that is taller than the toothrow, and a deep dentary, typical of herbivores. The anterior-most cheekteeth are more cone shaped than the caniniform teeth of megalonychids sloths. Though, like two-toed sloths, the cheekteeth lack enamel, with a core of dentin and outer layer of harder orthodentin. As these wear down, they produce occlusal surfaces with a raised perimeter and deep basin in the center. Their bodies are smaller than two-toed sloths (up to 6kg) with more limited diets (mainly leaves but occasionally twigs). They have three claws on their syndactylous forefeet with forelimbs much longer than their hindlimbs and live in tropical forests with dense canopies.
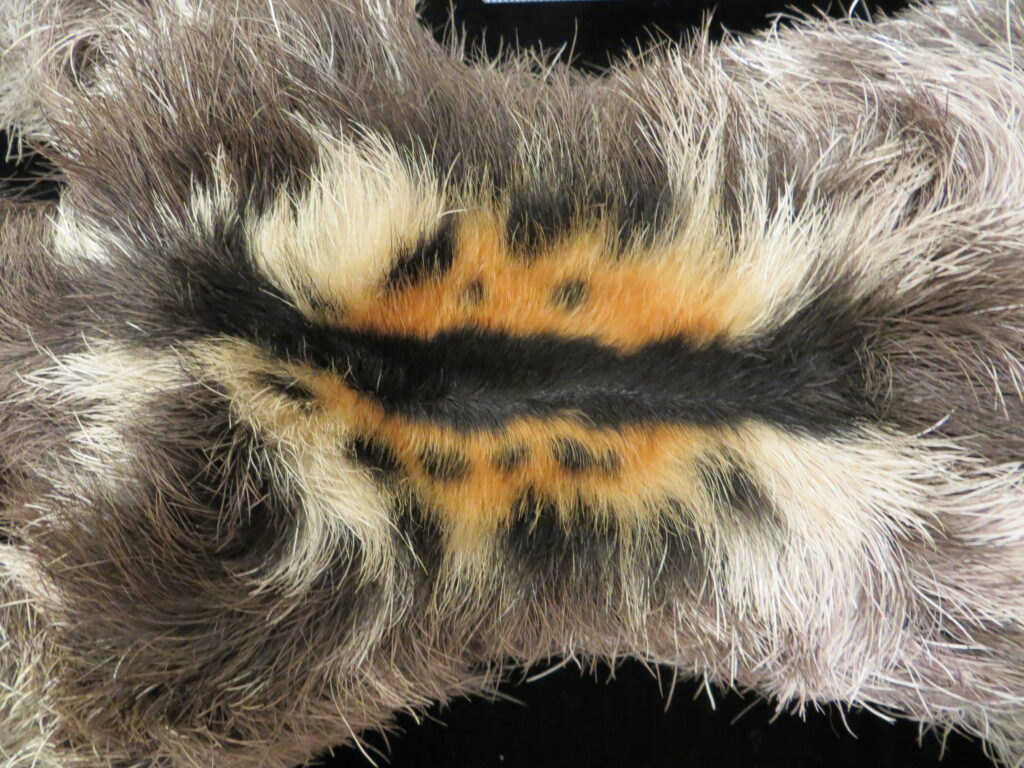
Male Bradypus have bright orange, black, and white patches of fur (speculum) on their backs that may serve as a signal of quality to females. The color patch may be linked to testosterone and larger, stronger males have brighter patches.
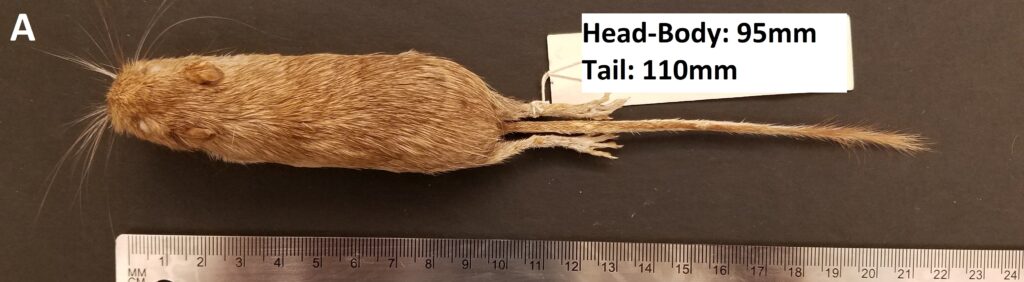
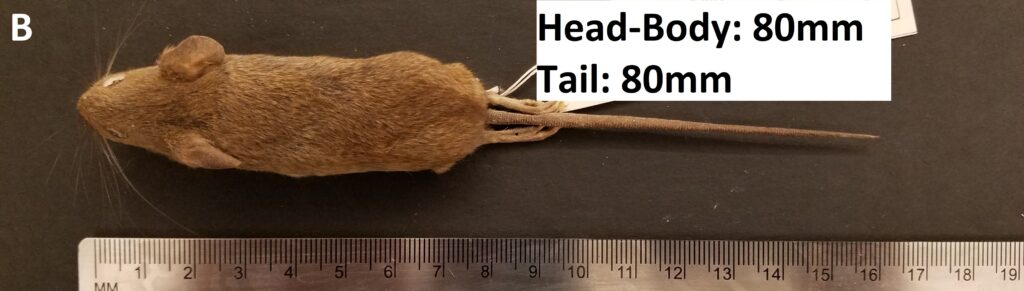
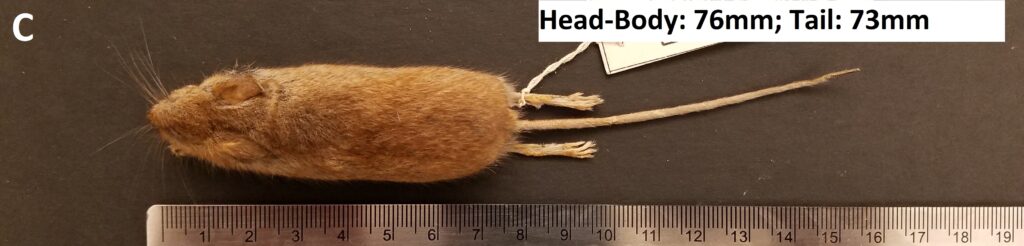
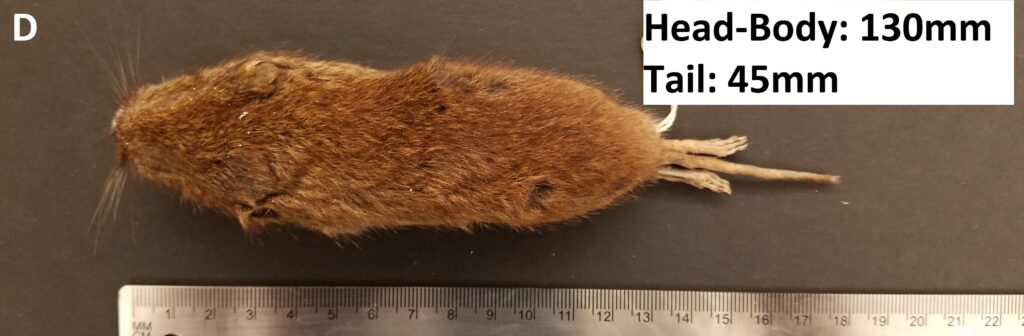
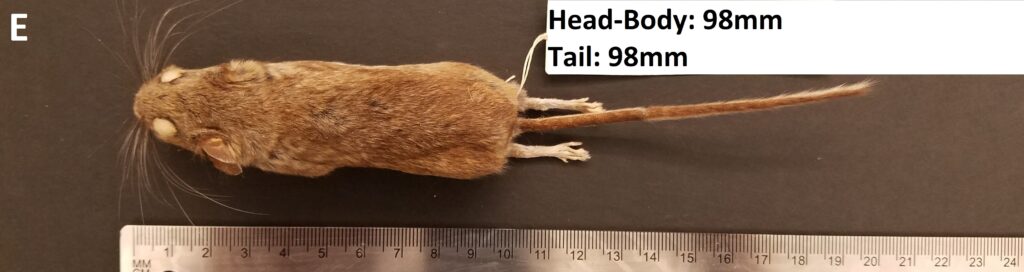
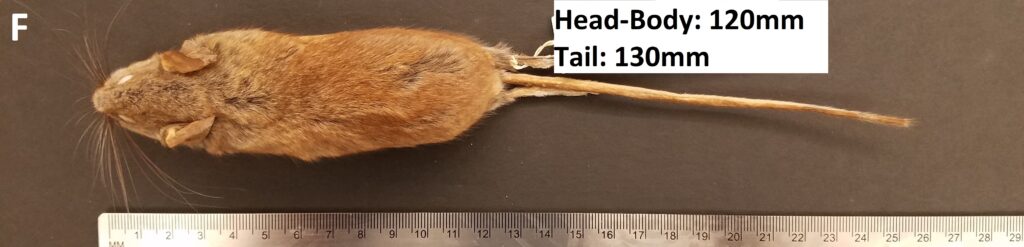
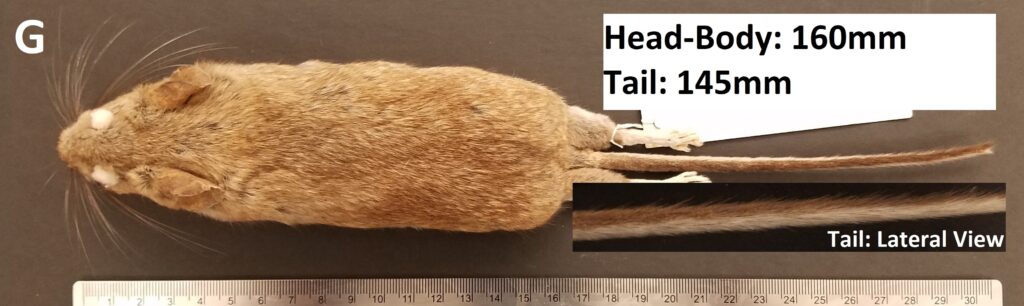
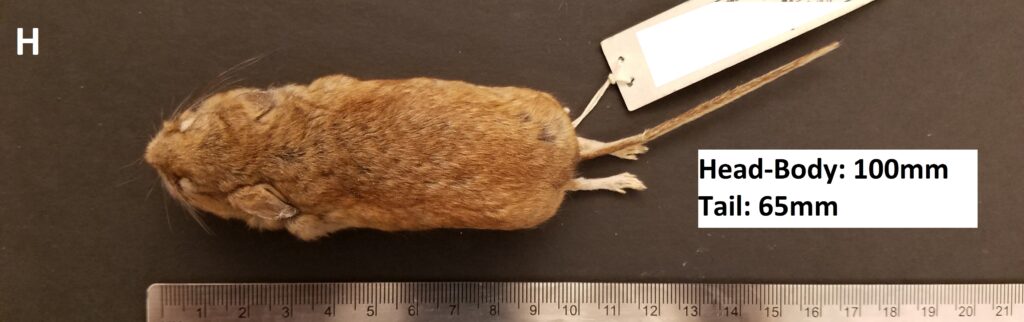
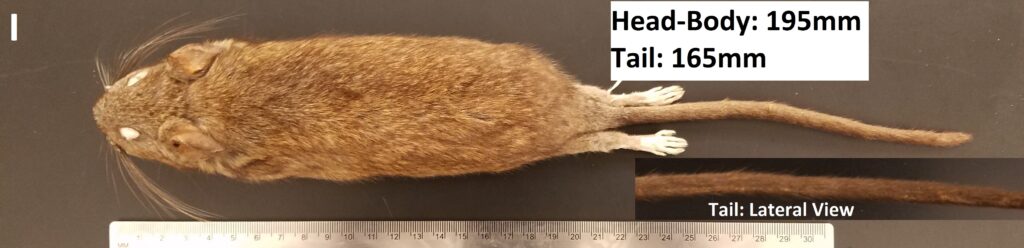
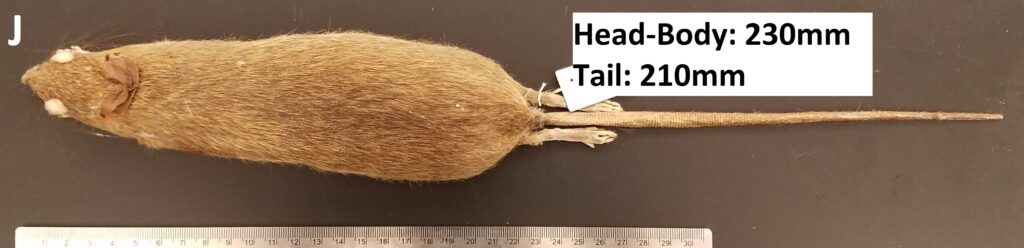
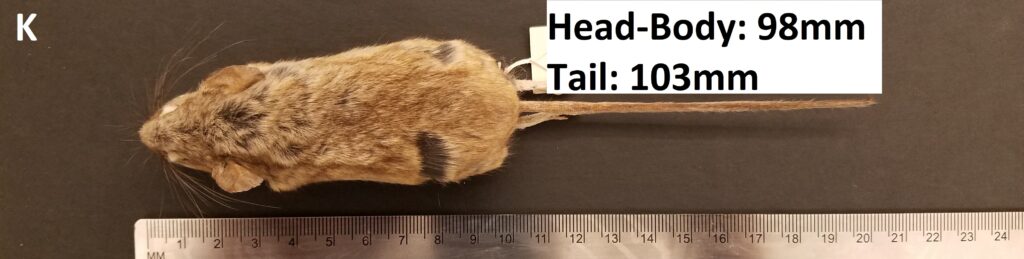
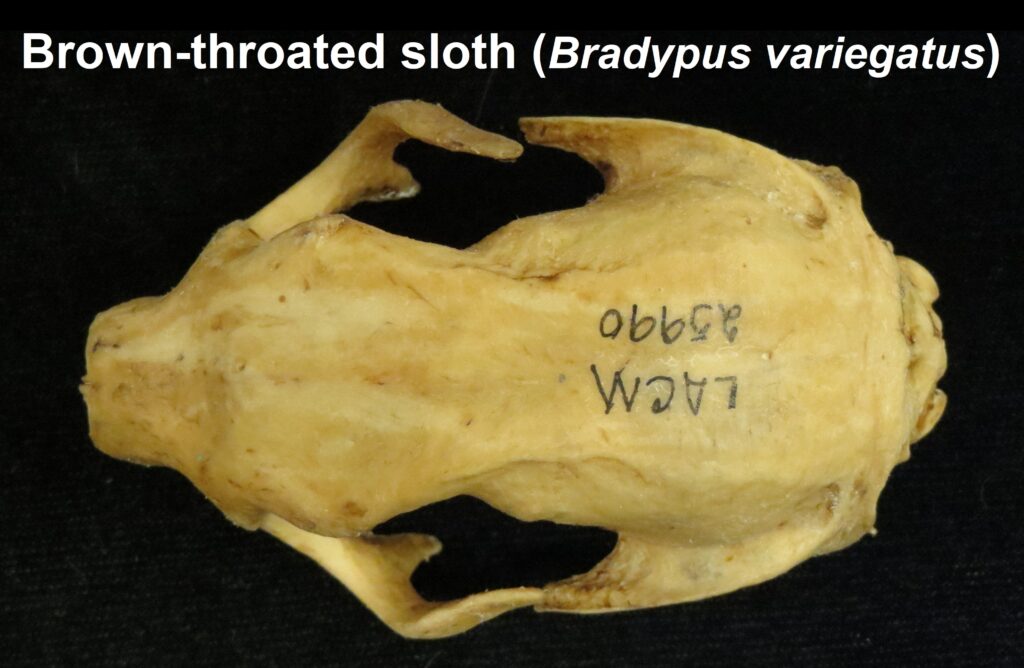
Specimen Images
- California State University Long Beach (CSULB): 1587, 7139
- Los Angeles County Museum of Natural History (LACM): 24827, 25990, 27345, 54547, 90859
- Royal Ontario Museum (ROM): 32245, 46260
References
- Feldhammer, G.A., Merritt, J.F., Krajewski, C., Rachlow, J.L., Stewart, K.M. 2020. Mammalogy: Adaptation, Diversity, Ecology. Johns Hopkins University Press, Baltimore.
- Kelt, D.A. & Patton, J.L. 2020. A Manual of the Mammalia. University of Chicago Press, Chicago.
- Lawlor, T.E. 1979. Handbook to the Orders and Families of Living Mammals. Mad River Press Inc., Eureka.
- Nowak, R.M. 2018. Walker’s Mammals of the World. Monotremes, Marsupials, Afrotherians, Xenarthrans, and Sundatherians. Johns Hopkins University Press, Baltimore.
- Prothero, D.R. 2017. The Princeton Field Guide to Prehistoric Mammals. Princeton University Press, Princeton.
- Ungar, P.S. 2010. Mammal Teeth. Johns Hopkins University Press, Baltimore.
- Upham N.S., Esselstyn, J.A., Jetz, W. 2019. Inferring the mammal tree: Species-level sets of phylogenies for questions in ecology, evolution, and conservation. PLoS Biol 17(12): e3000494. Reprint
- Wilson, D.E. & Mittermeier, R.A. eds. 2018. Handbook of Mammals of the World. Vol. 2. Insectivores, Sloths and Colugos. Lynx Edicons, Barcelona.